
- Sticking parking brake can be caused by corroded cables, damaged return spring, or locked caliper
- Forcing it can damage the transmission or engine
- Check brake cables for rust, return spring, rear caliper arm, and piston locks
- Prepare vehicle with flashlight, lifts, goggles, wheel locks; lift and secure
The parking brake does not disengage when there is a problem with the return spring, the rear caliper swivel arm or when dealing with a locked piston caliper.
Problems with the parking brake can be quite daunting. If the brake does not disengage there is a risk of damaging the transmission system or engine when trying to force the parking brake.
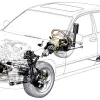
The role of the parking brake is quite simple and has the role of keeping the car in a stable position when it is stopped.
If the return spring of the parking brake breaks when the parking brake is applied, then it cannot return to the initial position. In any case, it is good to know that there are several problems that can cause the parking brake to disengage.
If the parking brake does not disengage, it is good to check the following aspects:
- brake cables that are affected by corrosion or show signs of rust
- return spring visibly damaged or completely missing
- the pivot arm of the rear caliper is locked
- caliper with a locked piston
How to prepare the vehicle to check the condition of the brake cables?
To perform this work, you will need the following materials - flashlight, car lifts, goggles, wheel locking systems.
Step 1. Park the vehicle on a rigid and straight surface. If your car is equipped with an automatic transmission, it is good to leave the transmission in the parking mode. If your car has a manual gearbox, it is advisable to use the first gear.
Step 2. Position the wheel locking systems at the rear tires that will remain at ground level. Apply the parking brake to prevent the rear wheels from moving.
Step 3. Pick up the car. Using a car lift corresponding to the weight of your car, apply the lift and completely lift the wheels off the ground.
Step 4. Place the brackets. Lower the car to their level. In the case of modern cars, the place where these supports are applied will be located at the level of the welding area, located below the level of the doors on the bottom of the machine.

Check the condition of the brake cables
Step 1. Put on your goggles and use your flashlight. Accurately locate the position of the brake cables.
Step 2. Check these cables for signs of corrosion or rust. Check the brake cable pin for corrosion up to the brake pedal.
Step 3. Check the connections. It is good to inspect the area where the brake cables attach to the rear brakes. Check for signs of corrosion at this level.
How to get the car down after you have finished inspecting
Step 1. Gather all the tools you used and set them aside somewhere.
Step 2. Lift the vehicle. Using an elevator suitable for the weight of your car, lift until the wheels no longer have contact with the ground.
Step 3. Remove the brackets and place yourself away from the car.
Step 4. Lower the car until all four wheels reach ground level. Take out the elevator and set it aside.
Step 5. Remove the wheel locking systems from the rear of the car.
Replace any cable that is affected by corrosion or rust.
How to prepare the vehicle to check the condition of the return spring?
To perform this operation you will need a flashlight, screwdrivers, stands, goggles, hammer, lever, torque wrench and wheel stop system.
Step 1. Park the vehicle on a flat surface. If the vehicle is equipped with an automatic transmission, it is good to leave the transmission in parking mode. If you have a manual gearbox instead, it is advisable to use the first gear.
Step 2. Position the wheel locking systems at the rear tires that will remain at ground level. Apply the parking brake to prevent the rear wheels from moving.
Step 3. Lift the car using a car lift corresponding to the weight of your car and lift the vehicle completely off the ground.
Step 4. Place the brackets. Lower the machine to the level at which the supports are located. In the case of modern machines, the application site will be located at the level of the welding area below the level of the doors at the bottom of the machine.
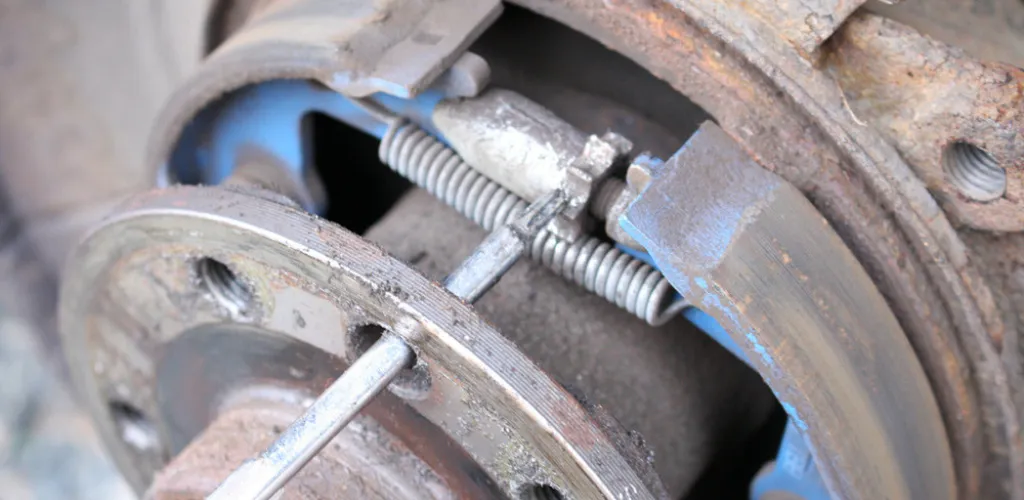
How to check the condition of the return spring?
Step 1. Put on your goggles and use the flashlight. Locate the position of this arc.
Step 2. Check if the return spring is broken, out of place , or missing.
Step 3. Remove the studs from the rear wheels. Now remove the wheels.
Step 4. If your car has brake drums, it is good to use a hammer to separate them from the wheels.
Tip - it is advisable not to hit the studs. If you do this you may need to replace them.
Step 5. Remove the drums. If you cannot remove them, it is advisable to use a screwdriver to loosen the brake shoes on the rear wheels.
Step 6. Check the condition of the return spring. Also check if the parking brake return spring is damaged, broken or missing.

How to lower the vehicle after checking the condition of the return spring?
Step 1. Gather all the tools you used and set them aside somewhere.
Step 2. Lift the vehicle using an elevator indicated for the weight of your car, lift the car until the wheels no longer have contact with the ground.
Step 3. Remove the brackets and place them away from the car.
Step 4. Lower the car until all four wheels have reached ground level. Take out the elevator and set it aside.
Step 5. Remove the wheel locking systems from the rear of the car.
If necessary, call a mechanic to check the condition of the return spring if it is faulty.
How to check the condition of the rear caliper swivel arm?
For this operation you will need a flashlight, screwdrivers, brackets, goggles, hammer, lever, torque wrench and wheel locking systems.
Step 1. Park the vehicle on a flat surface. If the vehicle is equipped with an automatic transmission, it is good to leave the transmission in parking mode. If you have a manual gearbox instead, it is advisable to use the first gear.
Step 2. Position the wheel locking systems at the rear tires that will remain at ground level. Apply the parking brake to prevent the rear wheels from moving.
Step 3. Remove the studs from the wheels but not before lifting the machine from the ground.
Step 4. Lift the car using an elevator indicated for the weight of your car, lifting until the wheels no longer have contact with the ground.

Step 5. Place the brackets. Lower the machine to the level at which the supports are located. In the case of modern machines, the application site will be located at the level of the welding area below the doors at the bottom of the machine.
How to check the condition of the rear caliper swivel arm?
First of all you will need goggles and a flashlight. Remove the studs. Check the condition of the pivot arm for signs of corrosion or damage. Check if the surface is bent or if the arm seems to be locked in a certain position.
How to lower the vehicle after checking the condition of the rear caliper swivel arm?
Step 1. Gather all the tools you used and set them aside somewhere.
Step 2. Lift the vehicle. Using an elevator suitable for the weight of your car, lift the car until the wheels no longer have contact with the ground.
Step 3. Remove the brackets and place them away from the car.
Step 4. Lower the car until all four wheels have reached ground level. Take out the elevator.
Step 5. Use a torque wrench and apply the studs.
Step 6. Remove the wheel locking systems and set them aside.
How to check the condition of the parking brake caliper that has a locked piston?
Step 1. Park the vehicle on a flat surface. If the vehicle is equipped with an automatic transmission, it is good to leave the transmission in parking mode. If you have a manual gearbox instead, it is advisable to use the first gear.
Step 2. Position the wheel locking systems at the rear tires that will remain at ground level. Apply the parking brake to prevent the rear wheels from moving.
Step 3. Remove the studs from the rear wheels.
Step 4. Lift the car with an elevator indicated for the weight of your car. Raise until the wheels are no longer in contact with the ground.
{{{ad-code}}}
Step 5. Place the brackets. Lower the machine to the level at which the supports are located. In the case of modern machines, the application site will be located at the level of the welding area below the level of the doors at the bottom of the machine.
How to check the parking brake caliper?
First of all you will need goggles and a flashlight. Remove the rear wheels. Remove the retaining screw from the top of the caliper.
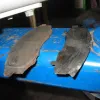
Remove the caliper from the rotor and remove the brake pads. Use a straight screwdriver to tighten the caliper piston.
This piston is provided with a thread that when rotated allows to adjust the braking mechanism.
How to lower the vehicle after checking the condition of the rear caliper swivel arm?
Step 1. Gather all the tools you used and put them aside.
Step 2. Lift the vehicle using an elevator indicated for the weight of your car, lift the car until the wheels no longer have contact with the ground.
Step 3. Remove the brackets and place them away from the car.
Step 4. Lower the car until all four wheels are at ground level. Take out the elevator.
Step 5. Use a torque wrench to apply the studs.
Step 6. Remove the wheel locking systems.
Photo source: nearsay.com, eeuroparts.com, automotivenews.co, saccrestorations.net