- Headliner sagging stems from wear, moisture, or faulty factory adhesive.
- Removal is the first and hardest step, requiring patience and organization.
- Detach sun visors, lights, consoles, handles, seals, pillars, and seat belt.
- Work in a ventilated area; adhesive fumes are flammable.
The headliner upholstery is an important element of any car interior, offering not only a visually pleasing appearance but also sound and thermal insulation. Over time, due to wear, moisture, or poor factory adhesive, this fabric can start to detach and sag. This is a common issue in older cars, but it can also occur in relatively new vehicles if they have been exposed to extreme conditions.
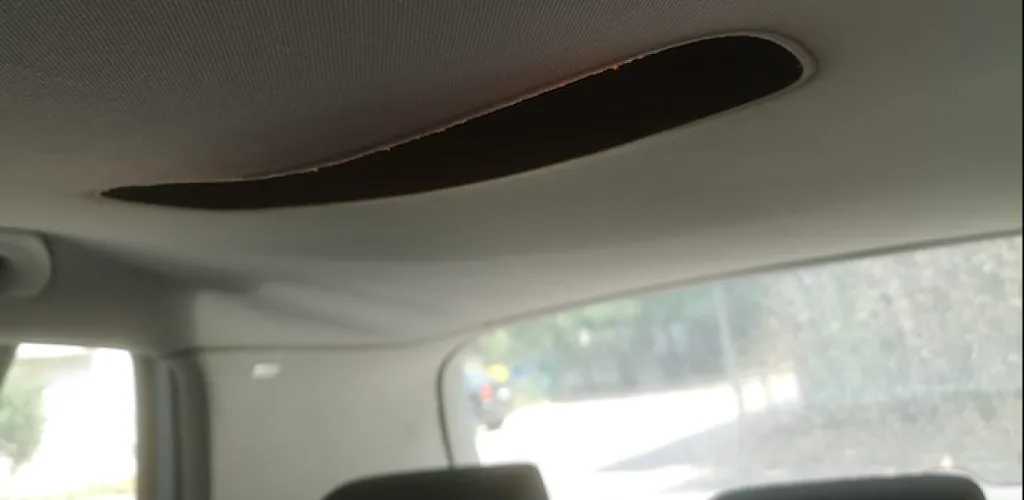
In most cases, detachments begin at the edges or in areas where the headliner is perforated for the interior lights and visors. Once the upholstery starts to detach, the problem worsens quickly, with the fabric hanging more and blocking visibility in the rearview mirror or even obstructing the forward view. Fortunately, repairing the car headliner is a project you can do yourself, saving significant costs compared to the services of a professional auto upholsterer.
Headliner removal — the first and most important step
Before you begin the repair itself, you must completely remove the headliner from the car. This is the most challenging stage and requires patience and attention to detail. The difficulty of this operation varies considerably depending on the make and model of the vehicle.
To access and remove the headliner, first remove all elements that hold it in place or block access:
- Sun visors — usually fixed with 2-3 screws hidden under plastic covers
- Interior lights and the overhead console — detached by pressing or with a plastic pry tool
- Passenger grab handles — fixed with screws
- Rubber seals around the doors and around the rear window or rear windshield
- Upper side panels (A, B and C pillars) — held with plastic clips
- Rear seat belt — may require loosening or removal
Use appropriate tools to avoid damaging plastic parts. A set of plastic panel removal prying tools is ideal. Work methodically, label the screws, and organize them to ease reassembly.
Removing the headliner from the car
Once you have removed all mounting elements, the headliner will be free, but taking it out of the cabin can be challenging. In most vehicles, you will need to lower it back first, then tilt and pull it out through the rear door or through the trunk. Some models may require opening both the front and rear doors to create enough space.
Be careful of sharp edges and do not bend the headliner too much — the rigid substrate made of pressed cardboard or fiberglass can crack if forced too far.
Surface preparation and removal of the old headliner fabric
After removing the headliner, find a suitable workspace — ideally a covered, well-ventilated area away from heat sources and open flames (the adhesive you will use is flammable). Place the headliner face up on a flat, clean, stable surface — a large table or workbenches.
The procedure for removing the old fabric depends on its condition:
For fabric that peels away easily: Simply pull the material off, removing it completely. If the old adhesive has dried and no longer adheres, this step will be quick.
For fabric still partly adhered: Use a soft wire brush or a plastic putty knife to scrape away the material and the deteriorated foam layer. Work systematically, in sections, until you completely remove the old headliner.
The goal is to reach the rigid substrate of the headliner, which should be as clean and smooth as possible. If large residues of old adhesive remain, remove them with an appropriate solvent (isopropyl alcohol or a plastic-surface degreaser). Let the surface dry completely before proceeding.
Choosing material for the new headliner
Auto headliner upholstery is available in various variants — the most common are foam-backed textiles, offered in several colors. The most widely used material is knit fabric with a foam-backed backing, which provides a professional look and is easy to work with.
For a standard-size car, you’ll need about 3 meters of material. It is recommended to buy a little extra (20–30 cm more) to ensure you cover the entire surface, especially if the headliner has a complex shape.
Applying the new headliner — the correct technique
With the headliner clean and dry and the new material prepared, you can begin the application:
Step 1 - Positioning and securing the material: Lay the new fabric over the headliner, with the foam side (adhesive) facing down, ensuring it covers the entire surface with excess material in all directions. Secure one edge with clips or strong tape to keep the material in place.
Step 2 - Preparation for bonding: Fold half of the material back, exposing the headliner substrate on about 50% of the surface. This allows you to work systematically, without risking movement of the material after the adhesive has been applied.
Step 3 - Applying the adhesive: Use a professional fabric adhesive spray (the most recommended products are from 3M or Würth). Spray a uniform and generous layer on the exposed headliner substrate, keeping the nozzle at a distance of 20–30 cm and using long, wide, overlapping strokes for full coverage.
Important: Read the spray instructions carefully. Most adhesives require application on both surfaces.
Step 4 - Drying time: Let the adhesive dry for 5–10 minutes. It should be tacky to the touch but not transfer residue to the fingers — if you touch it lightly, it should feel sticky but not leave a residue. This activates maximum bonding power.
Step 5 - Bonding the material: Unfold the material and place it over the adhesive-covered area, starting from the fixed edge. Use a smoothing tool — a plastic spatula with rounded edges or a headliner-specific roller — and work from the center toward the edges with firm but controlled motions. The goal is to remove any air bubbles and ensure perfect contact between the fabric and the substrate.
Do not press the material directly with your hand! This will leave marks and creases, and the adhesive may transfer to your fingers.
Step 6 - Repeating for the other half: Fold the remaining material, apply adhesive to the other half of the headliner, wait for the drying time, and repeat the bonding process.
Cutting and finishing
After the entire surface is covered and properly smoothed, proceed to finish:
Holes for accessories: In areas where interior lights, visors, or other elements will be reinstalled, feel with your fingers to locate the holes in the substrate and lightly mark them. With a sharp cutter, make X-shaped cuts over these points, then push the fabric corners inward toward the hole. The adhesive will hold the fabric in place.
Edges of the headliner: With a sharp cutter or scissors, trim the excess fabric from the perimeter of the headliner, leaving 1–2 cm of excess on all sides. This surplus will be covered by seals and side panels when you reinstall the headliner in the car.
Final check: Inspect the entire surface for any imperfections — wrinkles, bubbles, or areas not well adhered. If minor issues are found, you can spray a little adhesive under the fabric using a narrow nozzle and then smooth the area again.
Reinstalling the headliner in the car
Once the upholstery is perfectly applied and dry, you can reinstall the headliner in the car by following the reverse order of removal:
- Insert the headliner into the cabin using the same technique as for removal
- Position it correctly and start securing the side panels and seals
- Reinstall all accessories — interior lights, visors, handles
- Check that all clips and screws are firmly fixed
- Test the operation of all electronic components
Tips for a durable result
To ensure the repair lasts as long as possible:
- Always use quality products — a professional adhesive makes the difference
- Do not skimp on the headliner material — low-quality material will deteriorate quickly
- Work in a clean, dust-free environment to avoid inclusions beneath the material
- Avoid excessive humidity in the first 48 hours after the repair
- Do not leave the car in strong sun immediately after reinstalling — extreme heat can reactivate the adhesive
If you follow these steps carefully and with patience, you will end up with a headliner that has a professional look and will last without issues for at least 5–7 years, or even longer if the car is properly maintained and not exposed to extreme humidity or temperature.