- Hydraulic floor jack lifts the car quickly with less effort but misuse can cause injuries.
- Always locate lifting points per the owner’s manual; avoid incorrect spots and frame welds.
- Park on flat firm surface and engage parking brake before lifting.
Most car owners are aware of the importance of thorough maintenance and regular servicing of their vehicles. After all, purchasing a vehicle is a substantial investment and should be protected accordingly. Whether we are talking about a simple technical inspection or more complex maintenance interventions, it is essential that these tasks are performed in a timely and professional manner.
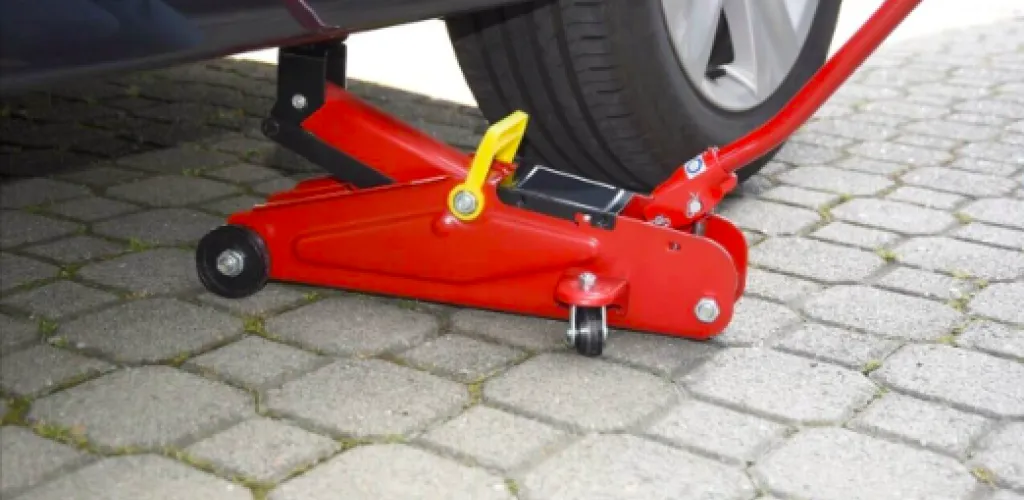
If you are passionate about cars or simply want to save money by doing these interventions yourself, you will need to own some basic equipment. One of the most important of these items is a hydraulic floor jack.
Why choose a hydraulic jack over a conventional one?
Normally, every car comes equipped from the factory with a conventional jack, but using it can be very cumbersome, and in some situations it may not handle the weight. The hydraulic floor jack helps us lift the car off the ground very quickly and easily, without having to exert any effort.
Many drivers do not use such equipment because it costs more than a plain jack and, at the same time, they do not know how to use such a tool properly. Since it operates using a hydraulic process, improper use of the jack can cause serious injuries and costly losses.
Nevertheless, the way to use a crocodile jack is very simple and anyone can learn to handle this equipment based on straightforward instructions, either from the product manual or from a video on the internet.
Identifying the vehicle’s lifting points
When you are about to use a hydraulic jack, the most important factor to keep in mind is to correctly identify the vehicle’s lifting points. Each car is equipped with several points along the side sills and which are made from a harder material so they are structurally solid and can support the weight when lifting the car.
Attention: If you fix the jack in a point other than the indicated one, you can cause damage very easily, as it will not hold.
Even though for most cars the location of the lifting points is the same, we strongly recommend reading the owner’s manual carefully to correctly identify these points, especially if this is your first time performing this operation. After that, it will be very easy to do this operation yourself in the future.
For most cars, lifting with the jack can be done at the welds of the frame rails, but we do not recommend using it this way. As long as you have access to the frame rails and the owner’s manual does not specify another method, this is the option you should opt for. Usually, reinforcements along the frame rails are near the wheels, so that is the place from which to start.
Step-by-step guide for lifting the car with the hydraulic jack
Step 1 - Position the vehicle properly
The first step to successfully lifting any vehicle with a jack is to position the vehicle in a suitable spot for this operation. The car must be parked on a flat and firm surface. Never attempt to use a hydraulic jack on uneven or soft ground.
Step 2 - Engage the parking brake
The next step is to ensure that the car’s hand brake is applied. This aspect is very important to prevent the car from moving while it is raised on the jack.
Step 3 - Position the wheel chocks
Next, position a set of wheel chocks behind the tires that will stay in contact with the ground. This factor is very important, especially for larger vehicles such as SUVs that have more weight. The chocks should always be placed before you start lifting the car, beneath the wheels opposite to the ones you will lift.
For extra safety, these chocks can be lightly wedged using a rubber rod, placing them between the tire tread and the ground itself. Like applying the emergency brake, this prevents the vehicle from moving while it is raised and provides more safety.
Step 4 - Identify and verify the lifting point
Before you start maneuvering the jack itself, it is important to carefully verify the vehicle’s lifting points. If you are unsure about these lifting points, stop and consult your vehicle’s owner’s manual. If the car is older and seems that a point lacks resistance, opt for another lifting point.
Step 5 - Position the jack carefully
After we have checked the lifting points and decided how we will lift the car, we will mount the jack carefully in the appropriate position. After positioning it, we will install the possible chocks, after which we can begin lifting.
Step 6 - Begin lifting the vehicle
Now we have reached the most important part and the actual lifting of the car, up to this point it has been only preparation. When lifting the vehicle, it is important not to make sudden movements and to ensure as smooth a process as possible. If we notice that the vehicle’s stability decreases during lifting, we should stop immediately and begin lowering to bring the car back to its initial position.
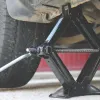
Step 7 - Place the jack stands
Once the car has reached the desired height for the operation, place the jack stands under the vehicle’s frame. The stands must be placed evenly so that they do not wobble at all. We will lower the vehicle slightly until it settles onto the stands so that it has a perfectly stable position. Now you can start performing the necessary work on the car.
Step 8 - When you’re finished, lift the vehicle slightly and remove the stands
After you have completed all the maintenance work you planned, you will slightly lift the car with the jack so that the stands can be moved away and removed. The stands should come off very easily, with little effort. At this point you can more easily check that you haven’t left any tools under the car and that there are no fluid leaks.
Step 9 - Lower the vehicle
The final step to complete the intervention on the car is to slowly lower the car with the jack. The lowering method is the same as lifting, and the process of using the jack is similar. After the car has reached the ground and you verify contact with the ground, you can remove the jack and the supporting chocks used at the beginning.
Safety tips for using a hydraulic jack
- Do not ever work under a car with only the jack: Always use dedicated safety stands after lifting the vehicle.
- Check the load capacity: Make sure your jack can support the weight of the vehicle. Check the specifications in the manual.
- Regular inspection: Periodically inspect the jack for hydraulic oil leaks,或 worn valves or pistons.
- Stable surface: Never lift the car on soft ground, hot asphalt, or inclined surfaces.
- Protective equipment: Wear protective gloves and safety glasses when working under the car.
sursa foto: https://www.rollfast.ro/