- Small rust spots can be fixed at home with body filler or fiberglass.
- Do not repair structural rust; consult a specialist instead.
- Prep in a ventilated space with masking and protective gear.
- For body filler, remove surrounding paint and sand rust thoroughly.
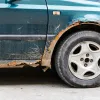
Rust on a car’s body is not just an aesthetic issue—it can cause serious structural damage and may prevent the vehicle from passing the technical inspection. Fortunately, for small rust spots, you can perform repairs at home with the right tools and materials.
An untreated rust spot spreads quickly and can cause serious problems over time. In addition to the unsightly appearance, rust reduces the car’s value and, in many countries, can prevent passing the technical inspection. Repairing a hole caused by rust isn’t a difficult process, but it requires patience and the correct technique.
Note: This guide covers minor body repairs. If rust has affected structural components (chassis, suspension parts or other load-bearing parts), consulting a specialist is mandatory.
Preparation for rust removal
Assessing the damage
Before starting the repair, assess the extent of the rust. For small holes that are not in structural areas, you can use either a body filler kit or a fiberglass kit. Both methods will restore the original appearance and prevent the rust from spreading.
Choosing the right method
There are two main approaches to repairing rust:
- Body filler kit — ideal for small and medium holes
- Fiberglass kit — suitable for larger areas or bigger holes
Method 1: Using a body filler kit
Required materials
- Body filler kit
- Protective mask (preferably a respirator)
- Electric polisher with wire brush or grinding disc
- Ball-peen hammer
- Rust-resistant primer
- Automotive paint (exact color of the car)
- Safety goggles
- Sandpaper grits 180, 240, 400
- Rust converter (optional)
Professional tip: To find the right paint, check the color code on the driver’s door or consult a specialized auto parts store.
Preparing the workspace
You need a covered, well-ventilated, and well-lit space—ideally a garage. Remove any objects that could get dirty, as this process generates a lot of dust and debris.

Protective equipment - essential for safety
Eye protection: Safety goggles are mandatory. Grinding produces sparks and metal particles that can cause serious injuries. If you wear prescription glasses, use safety glasses that fit over them.
Respiratory protection: At minimum a surgical mask, but ideally a respirator to protect against toxic chemicals and metal dust.
Clothing: Long pants and a long-sleeve shirt for protection against sparks. Work gloves to protect against cuts and chemicals.
Preparing the car
Cover the entire car with newspaper or masking paper, leaving only the rust-affected area exposed. Protect the tires, glass, and chrome trim. For delicate areas, use more robust materials.
Removing the paint around the rust
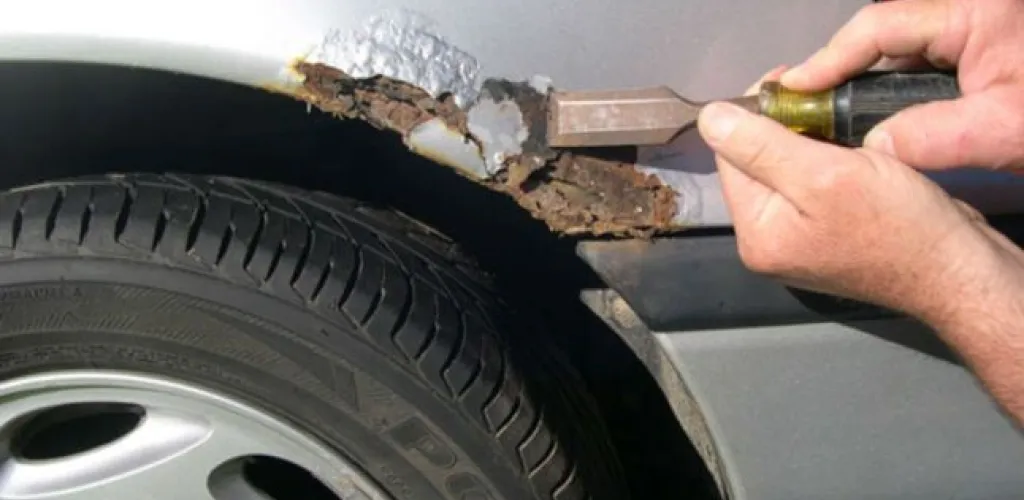
Use sandpaper with grit 80-150 or an electric grinder to remove all paint around the rusted area. This step is crucial for a durable repair.
Complete rust removal
Use the sanding tool to remove all rust until you see the shiny metal of the body. Don’t stop until rust is completely gone—even small traces can cause the problem to recur.
Note: If holes form during sanding, don’t worry—the filler material will fix the problem.
Applying rust treatment
If you have a rust converter, apply it according to the manufacturer’s instructions. It converts remaining rust into a polymer film that acts as a primer and prevents rust from reappearing.
Applying primer
Paint the affected area with rust-resistant primer. This will protect against moisture and ensure optimal adhesion for subsequent layers.
Leveling the surface
If necessary, use the ball-peen hammer to level the body before applying the filler.
Preparing and applying the filler material
Follow the instructions carefully—excess hardener will make the mix set too quickly. The kit includes filler paste, hardener, and backing material (galvanized metal or fiberglass cloth).
Insert a piece of metal behind the hole for stabilization, then apply the filler paste in small amounts with the plastic applicator. Continue until the opening is completely covered and level with the car body.
Sanding and finishing
Allow the substance to dry, then sand with 180-grit. Progressively use finer grits (120-150, then 240) to achieve a perfectly smooth surface.

Apply primer, then paint the surface in the car’s color using a spray gun for professional results.
Method 2: Using a fiberglass kit
Required materials
- Fiberglass repair kit (resin, hardener, cloth)
- Electric polisher with wire brush
- Ball-peen hammer
- Rust-resistant primer
- Automotive paint
- Safety goggles
- Sandpaper grit 180
- Rubber gloves (mandatory)
Preparation and rust removal
The preparation process is identical to the previous method. Remove the rust completely using the electric grinder until you see the shiny metal.
Applying the rust-resistant primer
Paint the edges of the opening with rust-resistant primer or rust converter, following the manufacturer’s instructions.

Preparing the fiberglass resin
Mix the resin and hardener according to the instructions. Cut a piece of fiberglass cloth slightly larger than the opening.
Note: Fiberglass can irritate the skin. Always wear rubber gloves.
Applying the fiberglass layer
Place the cloth over the opening on the inside. Use a brush to apply the mixture over the cloth, then apply the resin with the plastic applicator.
Finishing the repair
Let it dry completely, then sand with 180-grit until level with the car body. Repeat if necessary to achieve a perfectly smooth surface.

Apply the primer, then paint the surface to match the car color using a spray gun for professional results.
Final recommendations and preventive maintenance
When to call a professional
If you encounter difficulties or if rust has affected structural areas, consult a body shop specialist. For higher-quality finishes, professional painting is recommended.
Preventing rust in the future
- Regularly inspect the body for rust spots
- Treat scratches and chipped paint promptly
- Wash the car regularly, especially in the cold season
- Apply protective wax periodically
- Check rust-prone areas (sills, fenders, wheel arches)
Tips for optimal results
- Do not rush the process—complete drying between coats is essential
- Invest in quality tools for professional results
- Work in optimal temperature and humidity conditions
- Test the paint on a hidden area before the final application
Repairing rust at home is possible and can save significant costs, but it requires patience and adherence to correct techniques. With proper preparation and the right materials, you can restore the car’s original appearance and prevent further damage.