- Identify stain type (water-based vs oil-based) to choose the right method.
- Blot spills immediately; don’t rub, and blot from edge to center to prevent spreading.
- For water-based stains, wipe with warm water; avoid using water on oil-based stains.
- Advanced method for water-based stains: apply bleach-free detergent, baking soda, brush, and vacuum.
Stains on car upholstery are inevitable, no matter how careful you are. Whether it’s a cup of coffee spilled in traffic, your child’s juice, or drops of garage lubricant, knowing the correct cleaning techniques can mean the difference between saving the upholstery and a costly replacement.
Prompt and proper stain removal not only preserves the interior look of your car, but also helps prevent unpleasant odors in the car that can be extremely persistent. In this comprehensive guide, we present professional methods for removing different types of stains from upholstery.
Common Types of Stains on Auto Upholstery
Before you start cleaning, it is essential to identify the type of substance that caused the stain. This determines the cleaning method that will be most effective:
Water-based liquid stains:
- Fruit juices and sodas
- Milk and dairy products
- Coffee and tea
- Sparkling water
Oil-based liquid stains:
- Lubricants and automotive fluids
- Greasy food items (mayonnaise, butter)
- Cosmetic oils and creams
- Oil-based chemicals
Each type of stain requires a specific approach to avoid damaging the fabric or spreading the stain.
Immediate cleaning of spilled liquids
Materials needed
- Clean, absorbent cloths
- Paper towels
- Warm water
- Vacuum device (optional)
Step 1: Quick action is essential
Immediate absorption of the liquid is crucial to prevent it from seeping deeper into the upholstery fibers. Use a clean cloth or paper towels to blot the liquid from the surface with a light dab, not rubbing which can spread the stain.
Avoid circular motions that can cause the liquid to spread to a larger area. Instead, work from the edge of the stain toward the center.
Step 2: Removing the absorbed liquid
Press firmly with a clean portion of the cloth to absorb the liquid that has started to penetrate the fibers. This controlled pressure helps extract the liquid without forcing it deeper.

For plain water, continue the process until the cloth no longer absorbs visible moisture. For other liquids, proceed with the methods described below.
Important: If the liquid is not pure water, avoid rubbing the wet surface, as you may spread the stain to a larger area.
Step 3: Final cleaning for light stains
For superficial stains caused by water-based liquids (milk, juices), use a cloth slightly moistened with warm water to wipe the affected area. Warm water helps dissolve residues and neutralize natural colorants.
Important: Do not use water for oil-based liquids, as this can cause the stain to spread in the fabric.

Advanced method for water-based liquids
Materials needed
- Baking soda
- Quality cleaning cloths
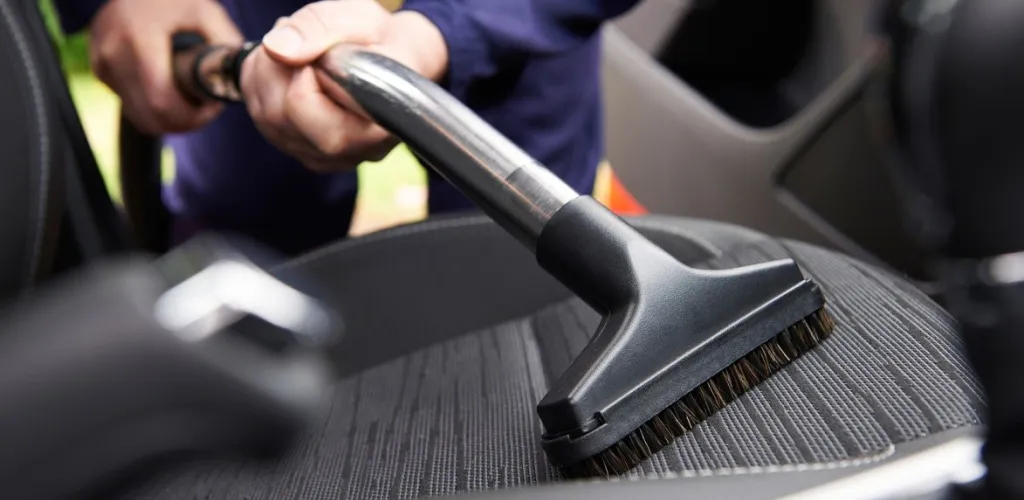
- Soft natural-bristle brush
- Upholstery-specific detergent
- Vacuum with upholstery attachment
Step 1: Applying the detergent
While the stain is still damp, apply the upholstery detergent evenly over the affected area. Choose a detergent that contains no bleach and is suitable for your upholstery fabric.
Spray until the detergent has penetrated to the same depth as the liquid that caused the stain.
Step 2: Mechanical action
With a soft brush, work the detergent into the fabric using gentle circular motions. This mechanical action helps loosen particles that adhered to the fibers and activates the detergent’s cleaning properties.
Step 3: Removing the detergent
Remove the detergent and residues with a clean, absorbent cloth. Work from the outside of the stain toward the center to prevent spreading.
Step 4: Controlled drying
Blot the remaining moisture firmly with a dry cloth. It is crucial to remove as much moisture as possible to prevent the stain from returning to the surface and to avoid odors.
Step 5: Drying period
Allow the upholstery to dry completely – the surface will dry in a few hours, but the fabric interior may take up to 24 hours for full drying.
Step 6: Additional treatment if needed
If the stain is still visible after full drying, repeat applying the detergent, let it sit for 10 minutes, then repeat steps 2-5.
Step 7: Odor neutralization with baking soda
Apply a uniform layer of baking soda over the cleaned area, ensuring it covers the stain completely. Work the baking soda into the fabric with a cloth or soft brush.

Sodium bicarbonate will absorb and neutralize persistent odors, especially those from sour milk. For maximum effectiveness, let the baking soda stand for 2-3 days.
Step 8: Finalizing the process
Completely vacuum the baking soda using a vacuum with a upholstery attachment.
Step 9: Repeat treatment for persistent odors
For very persistent odors, such as sour milk, you may need to repeat the baking soda treatment several times until the odor is fully eliminated.
Specialized technique for oil stains
Oil stains require a different approach because you need to prevent the oil from seeping deeper into the fabric. Using a water-based cleaner can cause the oil to spread.
Materials needed
- Clean, absorbent cloths
- Concentrated dish detergent
- Warm water
- Soft brush (natural or synthetic)
Step 1: Removing surface oil
Remove as much oil as possible by blotting with a clean cloth. Use a fresh area of the cloth for each application and continue until the cloth no longer absorbs visible oil.
Step 2: Applying dish detergent
Apply a small amount of concentrated dish detergent (about the size of a 50-cent coin) directly onto the stain. Dish soap is formulated to dissolve greases and is highly effective for oil stains.
Step 3: Activating the detergent
Work the detergent into the fabric with a clean cloth or soft brush, using short, controlled motions. If the stain is persistent, use the soft brush with circular motions until the stain edges begin to disappear.
Step 4: Rinsing with warm water
Moisten a cloth with warm water and press on the treated area with the detergent. Rinsing with warm water will create foam, indicating that the detergent is working.
Rinse the cloth frequently and repeat the process until no foam appears on contact with water.
Step 5: Complete drying
Allow the upholstery to dry completely, which can take from several hours to several days depending on the size of the treated area and environmental conditions.

Step 6: Evaluation and repetition of treatment
If the stain has not disappeared completely after final drying, repeat steps 1-5 until the stain is fully removed.
When to call professional services
If after applying the methods described above the upholstery has not returned to its original appearance, or if:
- The stain covers a very large area
- The substance has penetrated deeply into the fabric
- You had difficulty applying any of the steps
- The upholstery is made of delicate materials (genuine leather, alcantara)
it is advisable to seek professional car maintenance services. Specialiștii have professional equipment and products that can solve complex problems without damaging the upholstery.
Prevention tips
- Use seat protections in high-stain areas
- Keep a cleaning kit in the car (cloths, wipes, detergent)
- Treat stains immediately – the longer you wait, the harder they are to remove
- Avoid eating and drinking in the car as much as possible
- Regularly check the upholstery and proactively treat worn areas