- Scratches fall into surface, small, or deep categories by depth.
- Deep scratches require washing, sanding, priming, painting, and waxing.
- Sanding uses 2000 grit for clear-coat scratches; start with 1500 for deeper damage.
- Complete process: wash, dry, prime, paint in thin coats, then wax.
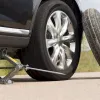
Every car owner has faced at least once minor incidents that leave marks on the body: scratches, paint chips, or dents in the body panels. Fortunately, most of these problems can be resolved at home with some patience and the right tools.
Automotive paint is protected by a clear coat that gives it gloss and protects it from external factors. This layer can be affected to varying degrees, and the repair method depends on the depth of damage. Depending on severity, scratches are divided into three main categories, each requiring a specific approach.
Types of car scratches and how to identify them
- Surface scratches: Affect only the clear coat
- Small scratches: Penetrate the clear coat down to the paint
- Deep scratches: Reach the metal of the body or the primer layer
A simple scratch test with your fingernail can help determine depth: if the nail catches in the scratch, it is not purely superficial.
Method 1: Repairing deep scratches with paint
Deep scratches require the most careful approach, as an improper repair can worsen the problem. Here are the six essential steps:
1. Thorough washing and drying of the car
A thorough cleaning is fundamental for a successful repair. Any dirt particles left on the surface can cause additional scratches during the repair process.
Use a quality car shampoo and microfiber cloths to remove residues from the affected surface. Pay special attention to the damaged area, ensuring it is perfectly clean.
2. Sanding the affected area
This step removes the damaged superficial layers of paint to prepare the surface for applying new layers.
Use sandpaper with grit 2000 for scratches that do not exceed the clear coat. For deeper damage, start with grit 1500. Sand with smooth linear motions for 10-15 seconds, then evaluate progress.

Pay attention to the sanding direction - keep the same direction to avoid creating new scratches. Rinse the surface periodically with water to assess progress.
3. Rinsing and thorough drying
After sanding, remove all particles and residues with clean water. Dry the surface with a clean microfiber cloth - a dirty cloth can introduce new abrasive particles.
4. Applying primer
Primer ensures optimal adhesion of the paint and protects the metal from corrosion.
Apply several thin layers of primer with uniform back-and-forth motions. Allow 5-10 minutes between layers for complete drying. Choose a primer color as close as possible to the car’s color for the best result.
5. Applying the paint
The paint should be applied in thin, uniform coats over the primed area. Wait 5-10 minutes between each coat to allow complete drying. Typically 2-3 coats are needed for full coverage.
6. Finishing with protective wax
Wax protects the freshly applied paint and gives it the characteristic gloss.

Apply wax with a microfiber cloth using circular motions and moderate pressure. Continue until the surface achieves a uniform shine. You can purchase complete kits that include all necessary materials from auto parts stores.
Method 2: Removing minor scratches with specialized products
For scratches that affect the paint but do not reach the metal, specialized scratch removal products are the ideal solution.
1. Preparing the surface by washing
As with deep scratches, cleaning is essential. Remove all residues that could cause further damage.
Use car shampoo and microfiber cloths for a gentle but effective clean. Dry the surface completely before proceeding.

2. Choosing the right product
Scratch removal kits usually include a polishing solution and an applicator sponge or cloth. These are formulated specifically to remove scratches without harming healthy paint.
3. Correct application of the product
Follow the manufacturer’s recommended amounts - usually a small amount is sufficient. Apply the product to the kit’s sponge, not directly on the car.
4. Working the affected area
Use steady circular motions to ensure even distribution of the product. Do not change the direction of movements during application - consistency is essential for an even result.
Ensure the product penetrates the scratch and covers the affected area completely.
5. Removing excess product
Do not allow the product to dry on the car surface. Immediately remove the excess with a clean, microfiber cloth. This step helps prevent stains and ensures a uniform finish.
6. Repeating the process if necessary
If the scratches are still visible after the first application, repeat the process a maximum of 2-3 times. Avoid overuse to prevent damage to the clear coat.
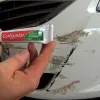
Method 3: Repairing superficial scratches with toothpaste
For very superficial scratches that affect only the clear coat, toothpaste can be a quick and effective solution.

1. Correct evaluation of the scratch
This method works only for superficial scratches. Test with your fingernail: if it does not catch in the scratch, you can try the toothpaste method.
2. Preparing the surface
Cleaning is crucial in this case as well. You can take the car to a car wash or wash it at home.

If you choose to wash the car at home, use a hose for the initial rinse, apply the shampoo with a brush or a specialized sponge, then rinse and dry with microfiber cloths.
3. Preparing the toothpaste
Whitening toothpaste seems to be the most effective due to its fine abrasive particles. However, any regular toothpaste can work.
Apply a moderate amount to a clean microfiber cloth.
4. Applying to the affected surface
Use circular motions with moderate pressure. The fine particles in the paste will act as a gentle abrasive, gradually removing the superficial scratch.

5. Removing residues
Rinse the area with clean water to remove all toothpaste. Dry with a microfiber cloth to evaluate the result.
6. Repeating if necessary
For optimal results, you can repeat the process 2-3 times. Do not exceed this frequency to avoid damaging the clear coat.
Important tips for all methods
- Always work in shade on a cool surface
- Test any product on a hidden area before using on a visible area
- Respect the drying times for each applied layer
- Use only clean materials and cloths to avoid additional scratches
- For very large or multiple scratches, consider consulting a specialist
These three methods cover most situations a car owner may face. With a bit of patience and attention to detail, you can restore the original look of the bodywork without high service costs.