- Alternator charges the battery and powers the vehicle’s electrical system.
- Signs of failure include battery warning light, hard starts, and abnormal noises.
- Main components include rotor, stator, regulator, diode bridge, and cooling.
The car alternator is a vital component of the electrical system in any modern vehicle, responsible for charging the battery and powering the entire electrical system—from starting the engine to headlights, wipers, the audio system, and all electrical consumers. Without a functional alternator, a vehicle cannot run in the long term, and the driver may become stranded on the road.
Understanding how the alternator works, as well as recognizing early signs of failure, is essential knowledge for any vehicle owner who wants to avoid unpleasant situations and extra costs.
Evolution and operating principle
Before the 1960s, automobiles used dynamos to generate electrical energy. However, dynamos had significant limitations in efficiency and reliability, which is why they were gradually replaced with alternators—much more efficient and durable devices.
Operating principle
Based on the law of electromagnetic induction, the alternator is an electric generator formed by a rotor driven via a belt connected to the engine. When the engine runs, the drive belt drives the alternator shaft, and it generates the electrical energy required to power the vehicle by rotating a magnetic field inside windings.
Main components of the alternator
- Housing – protective shell made of aluminum or cast iron
- Stator – fixed part with three-phase windings
- Rotor – moving part that creates the magnetic field via electromagnets
- Voltage regulator – controls the output voltage between 13.8-14.4V
- Bearings – ensure smooth rotation and reduce friction
- Slip rings – transmit the electrical current to the rotor
- Diode rectifier bridge – converts alternating current to direct current
- Cooling fans – cool the alternator during operation by circulating air
Signs that the car’s alternator is failing
1. Battery warning light on the dashboard
When the red battery warning light illuminates on the dashboard, there is a serious problem with the charging system. It means the alternator is no longer charging the battery while driving, the engine is drawing energy from the battery, and when the battery fully discharges, the vehicle will stop.
2. Problems starting the car
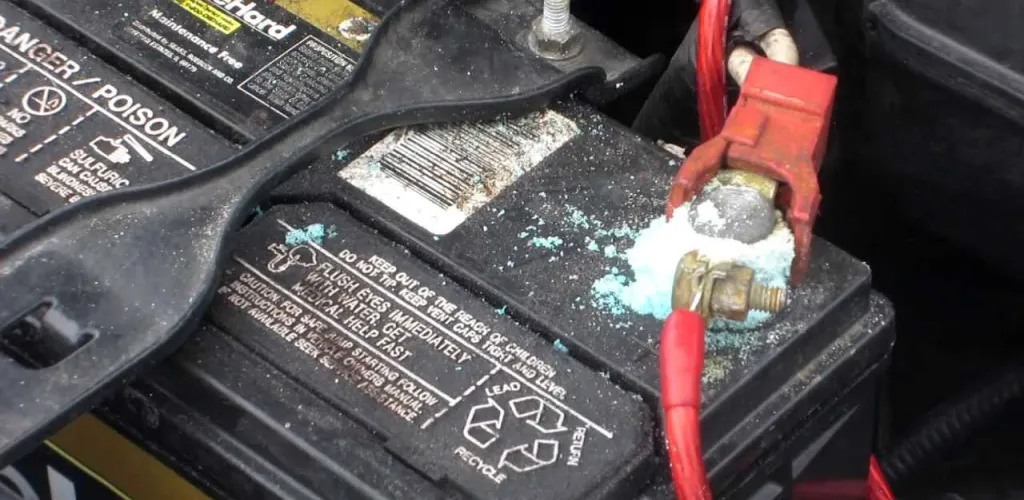
If you leave the car parked overnight and in the morning you find that it does not start or starts hard, there is a high likelihood that the problem is a defective alternator. The battery did not charge sufficiently during the last use and lacks the energy to energize the starter motor.
3. Noises under the hood
Inside the alternator there are bearings with lubricant that ensure proper rotation of the shaft. When the engine runs, the heat generated can dry this lubricant in the bearings. Lack of lubrication leads to increasingly loud noises, such as squeaks, whines, or even a metallic rubbing sound.

4. Malfunctioning electrical systems
When the alternator does not function properly, all electrical systems in the car may show visible dysfunctions:
- Headlights do not illuminate at normal intensity or flicker
- Lights dim or brighten abnormally when accelerating
- The audio system operates with distortion
- Air conditioning does not work properly or stops intermittently
- Cabin heating does not function correctly
- Power windows move slowly
5. Suspect smells
A smell resembling burnt rubber may indicate belt drive or alternator components overheating. Similarly, a burning electrical odor can signal problems with windings or the rectifier bridge.
6. Rapid battery discharge
A battery that discharges rapidly despite being in good and relatively new condition indicates that the alternator is not charging properly or there is an issue with the voltage regulator.
Testing the alternator – practical methods
1. Checking voltage with a multimeter
This is the most precise and reliable method for diagnosing alternator problems:
- Engine off: battery voltage should be around 12.4-12.6V for a fully charged battery
- Engine idling: voltage should be between 13.8-14.4V
- At higher RPM (2000-3000 rpm): voltage should not exceed 14.8V
- With electrical loads on: voltage should not drop below 13.5V
2. Headlight test
Go to a dark place and perform the following test:
- Turn on headlights with the engine idling
- Observe whether light intensity remains constant
- Gradually accelerate and check if the light output changes
- Turn on other loads (air conditioning, radio, window heaters/defoggers)
- If intensity varies significantly with RPM or loads, the alternator may be faulty
3. Battery teardown test
Note: This method is not recommended on modern cars with complex electronics (ECUs and multiple sensors).
On older cars (pre-2000):
- With the engine idling, briefly disconnect the negative battery terminal
- If the engine continues to run steadily, the alternator is generating sufficient energy
- If the engine stops or runs unstably, the alternator is likely defective
- Reconnect the battery immediately to avoid damage to electronic systems
4. Checking the drive belt
The drive belt is vital for the alternator’s operation:
- Check that the belt is tensioned correctly (deflection should not exceed 10-15 mm)
- Check for cracks, wear, splits or damage
- Look for signs of oil or contamination
- A loose belt can slip and reduce charging efficiency
- A belt that is too tight can damage the alternator bearings
Causes of alternator failure
Mechanical causes
- Bearing wear due to extended use or lack of lubrication
- Deterioration of the drive belt leading to slipping or breakage
- Cooling system problems causing component overheating
- Excessive vibrations caused by faulty engine mounting
- Corrosion of metal components due to humidity
Electrical causes
- Diode failure in the rectifier bridge (the most common failures)
- Problems with the voltage regulator causing overcharge or undercharge
- Short circuits in the stator or rotor windings
- Worn carbon brushes (in older models)
- Faulty slip rings
Environmental factors
- Water ingress into the alternator through ventilation holes
- Accumulation of dirt and dust affecting cooling
- Extreme temperatures (very cold or very hot)
- Road salt accelerating corrosion
- Operation under severe conditions (towing, off-road driving)
Life expectancy and maintenance of the alternator
Experts estimate the average lifespan of an alternator is about 5-7 years or approximately 100,000-150,000 km, depending on usage conditions, component quality, and adherence to maintenance schedules.
Factors affecting lifespan
- Driving style (urban vs. highway)
- Climatic conditions in the usage area
- Frequency of electrical load use
- Quality of fuel and lubricants
- Adherence to service intervals
Tips to extend lifespan
- Periodic checks - inspect the alternator annually or at every 20,000 km
- Belt maintenance - replace the drive belt according to the service schedule
- Cleanliness - keep the engine bay clean for optimal ventilation
- Avoid overloading - do not use additional electrical consumers that exceed the alternator’s capacity
- Check connections - ensure terminals are clean and properly tightened
- Avoid starting with a discharged battery - use jump cables rather than forcing the alternator
- Regular service - follow air filter replacement intervals to prevent clogging
Replacing the alternator
Preparation for replacement
Before starting the replacement, ensure you have all the necessary tools and have correctly identified the problem. It is also important to verify whether the fault is caused by a simple issue, such as a worn belt or a loose connection.
Dismantling steps
-
Vehicle preparation
- Stop the engine and let it cool completely (at least 30 minutes)
- Disconnect the battery (negative first, then positive)
- Raise the car if bottom access is required
- Use safety stands; do not rely solely on the jack
-
Removing components
- Take photos of cable positions before disconnecting
- Loosen the drive belt by releasing the tensioner
- Disconnect the power cables from the alternator (note the position of each)
- Remove mounting bolts (usually 2-3)
- Carefully extract the alternator from its location
-
Additional checks
- Check the drive belt for cracks or wear
- Inspect wiring for damage or corrosion
- Test the battery to ensure it is functional
- Clean contact surfaces and terminals
Installing the new alternator
-
Preparing the new component
- Verify that the new alternator matches specifications (amperage, voltage)
- Ensure all accessories are included
- Apply a thin layer of grease to terminals to prevent corrosion
-
Installation
- Install the new alternator in the correct position, following markings
- Tighten mounting bolts to the torque specified in the manual (usually 40-50 Nm)
- Reconnect all cables in the correct order according to the photos
- Install the drive belt and adjust the tension correctly
- Verify all connections are firm and secure
-
Finishing
- Reconnect the battery (positive terminal first, then negative)
- Start the engine and let it idle
- Check that the battery indicator goes out after 2-3 seconds
Post-installation checks
- Visual check: ensure there are no leaks or abnormal noises
- Electrical test: measure the output voltage with a multimeter (13.8-14.4V)
- Functional test: verify all electrical systems operate normally
- Road test: drive a short distance and observe behavior
- Final check: after 100-200 km, recheck belt tension
Different types of alternators
By amperage
- Standard (80-120 A) – for cars with basic electrical equipment
- High-output (130-200 A) – for vehicles with multiple electronic systems
- Heavy-duty (over 200 A) – for commercial vehicles or equipment-heavy setups
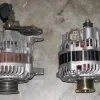
By technology
- Conventional alternators – with brushes and slip rings
- Brushless alternators – more reliable and with longer service life
- Permanent magnet alternators – more energy-efficient
Costs and economic considerations
Factors affecting costs
- Make and model of the car – premium cars have more expensive alternators
- Alternator power – high-power models (>120 A) cost considerably more
- Part type – new OE, new aftermarket, remanufactured, or used
- Installation complexity – some models require removal of other components
- Service location – labor costs vary by region
Available options
- New original OE alternator – most expensive option with full warranty
- New aftermarket alternator – good balance of price and quality
- Remanufactured alternator – economical option for older cars
- Used/second-hand alternator – cheapest option but with higher risk
Important recommendations
For modern cars with complex electronic systems (multiple ECUs, advanced sensors), use authorized service for alternator replacement and ECU programming. Always check the battery condition before replacing the alternator—a faulty or worn battery can affect the performance of the new alternator and cause premature failure. Use quality parts: a cheap, questionable-quality alternator can cause serious long-term problems, including damage to the vehicle’s electronic systems. Request a warranty: a quality alternator should come with a minimum 12-24 months warranty.
Preventing alternator failures
Recommended practices
- Avoid starting with jumper cables repeatedly—the repeated surge places excessive load on the alternator
- Do not disconnect the battery with the engine running on modern cars
- Periodically check the drive belt tension
- Clean the battery terminals for optimal connections
- Avoid exposing the engine bay to water
Early warning signs
- Unusual noises from the alternator area
- Minor fluctuations in headlight brightness
- Longer phone charging times in the car outlet
- Minor issues with the audio system
- The battery requires distilled water more often (in maintenance batteries)
Conclusion
The alternator is the heart of a modern car’s electrical system, and its proper operation is essential for safe, trouble-free driving. Early recognition of fault signs, regular checks, and adherence to maintenance schedules can prevent unpleasant situations and significant extra costs.
Investing in quality components and professional service pays off in the long term through greater reliability and by preventing cascading failures in other electronic systems. If you have any doubts about the alternator’s operation, consulting a specialist for precise diagnosis and professional repair remains the safest option to protect the vehicle’s entire electrical system.