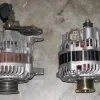
- The alternator charges the battery and powers all electrical systems.
- Regular checks prevent surprises and extend battery life by ensuring proper charging.
- Signs of a faulty alternator include battery light, dim headlights, hard starts, frequent discharges, noises.
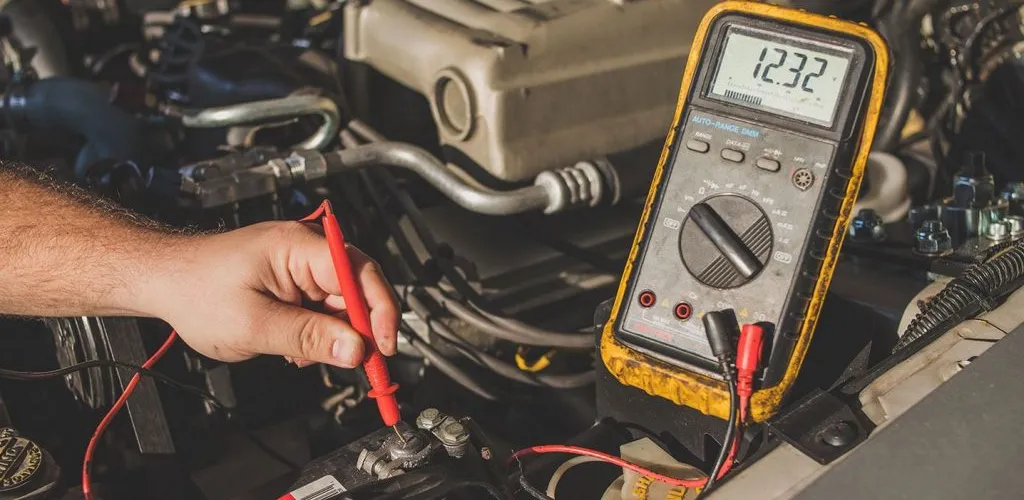
- Steps: use digital voltmeter; off-engine voltage 12.5–12.8V, idle voltage rises, charging voltage normal.
The alternator is the heart of a modern car’s electrical system. This essential component has a dual role: charging the battery and powering all of the vehicle’s electrical consumers—from headlights and the audio system to the on-board computers and climate control. Regularly checking the alternator’s condition not only prevents roadside surprises but also substantially extends battery life by ensuring a correct and steady charge.
Why regular alternator checks are important
An underperforming alternator can cause multiple electrical system problems. If it does not generate enough voltage, the battery will gradually discharge, and electrical loads may operate poorly or not at all. Conversely, an alternator that generates too much voltage can damage the battery and sensitive electronic components of the vehicle.
Signs of a faulty alternator include:
- Battery warning light on the dashboard
- Headlights flickering or dimming at idle
- Difficulty starting the engine
- Battery that discharges frequently
- Unusual noises coming from the alternator area
- Smell of burnt rubber or melted wiring
Proper voltmeter testing method
The safest and most accurate way to check the alternator is to use a digital voltmeter. This instrument is affordable and available from any auto parts store or tool shop, and it provides reliable voltage readings.
Why avoid disconnecting the battery
There is an old, dangerous and highly damaging method for modern electrical systems: disconnecting the negative battery terminal with the engine running. We never recommend this practice! Here’s why:
The battery does not only serve as a power source; it also acts as a buffer that stabilizes voltage and absorbs current spikes. When you disconnect the battery with the engine running, the voltage regulator of the alternator will try to compensate for its absence, forcing the alternator to supply maximum power. This can cause voltage spikes that can damage in seconds:
- The engine control unit (ECU)
- Infotainment system
- Electronic sensors
- Various control modules
- Even the alternator itself
Steps for correct alternator testing
Step 1: Battery voltage check with the engine off
Before testing the alternator, we must verify the battery’s state. With the engine off and all electrical loads disconnected, connect the voltmeter to the battery terminals (red at +, black at -).
A fully charged battery should read approximately 12.5–12.8 volts. If the voltage is below 12.4 volts, the battery is partially discharged and should be charged before testing the alternator to obtain correct results.
Step 2: Idle test
Start the engine and let it run at idle. Keep the voltmeter connected to the battery terminals. You should see an immediate rise in voltage. If the voltmeter reads higher than when the engine was off, that is a positive sign that the alternator is functioning.
Step 3: Charging voltage check
With the engine idling, the voltage at the battery should be in the range of 13.8 to 15.3 volts. This is the optimal operating range for most modern automotive electrical systems:
- Below 13.8 volts: underpowered or faulty alternator, worn voltage regulator
- 13.8–14.4 volts: ideal operating range
- 14.5–15.3 volts: acceptable operating range
- Above 15.3 volts: defective voltage regulator, risk of overcharging
Step 4: Load test
For a more complete check, connect multiple electrical loads: headlights, air conditioning, rear window heater, radio. The voltage should remain within the optimal range even under load. A drop below 13.5 volts indicates a weak or defective alternator.

Advanced tests and professional diagnostics
If basic readings indicate problems or if you want a detailed analysis of the electrical system, you will need specialized equipment such as:
- A professional alternator tester with output current measurement
- An oscilloscope for waveform analysis
- A tester for checking rectifier diodes
- An electrical system analyzer
These tools allow precise diagnosis of the alternator’s individual components:
Rectifier diodes: converts alternating current to direct current. Faulty diodes cause low charging voltage and characteristic noise.
Voltage regulator: keeps the output voltage constant regardless of engine speed. A faulty regulator can cause overcharging or undercharging.
Stator and rotor windings: shorted or open windings reduce alternator efficiency.
Bearings: worn bearings generate noise and can lead to alternator seizure.
For such complex diagnostics, we recommend contacting a qualified automotive electrician who has the necessary equipment and experience to identify the exact problem and provide the optimal solution.
Conclusion
Regularly checking the alternator with a voltmeter is a simple operation that can prevent costly problems and unpleasant situations. Investing in a quality digital voltmeter pays off quickly through savings and the peace of mind of a functional electrical system. Remember: the engine running voltage should be between 13.8 and 15.3 volts, and any significant deviation from these values requires immediate attention.