- P2036 signals high voltage from exhaust gas temperature sensor 2, bank 2
- Sensor 2 is downstream of the catalytic converter on bank 2
- SERVICE ENGINE SOON light, code stored, possible mild power loss, rare limp mode
- Wiring, sensor, or exhaust-system faults commonly trigger P2036
Code P2036 indicates a fault in the exhaust gas temperature sensor circuit, specifically sensor 2 on bank 2, where the PCM detects abnormally high voltage. This malfunction can affect catalyst efficiency and engine performance, and is important for emissions control.
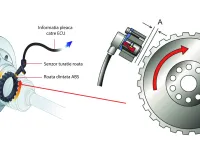
Bank 2 refers to the side of the engine that does not include cylinder 1, and sensor 2 designates the sensor located downstream of the catalytic converter. This positioning is crucial for monitoring gas temperature after the catalytic process.
What the P2036 code means
The Powertrain Control Module (PCM) continuously monitors exhaust gas temperature via specialized sensors. When the voltage read from sensor 2 of bank 2 exceeds the manufacturer’s preset limits, the system automatically stores code P2036 and activates the service engine soon indicator.
Exhaust gas temperature sensors operate on a thermistor principle — as temperature rises, sensor resistance falls, causing the voltage sent to the PCM to rise. Conversely, when the temperature falls (engine off), resistance rises and voltage falls.
Operating parameters and code triggering
Two‑wire sensor installed in the exhaust duct, supplied with a reference voltage of about 5V and its own ground wire. The PCM interprets voltage variations as temperature changes and adjusts accordingly:
- ignition timing
- air/fuel ratio
- catalyst protection strategies
When the voltage exceeds normal limits (indicating an apparently excessively high temperature), the system flags a circuit fault and stores P2036.
Symptoms of the P2036 code
These symptoms are typically fairly discrete:
- SERVICE ENGINE SOON light on the dashboard
- Code stored in the PCM memory
- Possible mild engine performance loss
- In rare cases, operation in limp mode
Usually drivers don’t notice significant changes in vehicle behavior, which can delay diagnosing the issue.
Common causes of the P2036 code
Wiring problems
The most frequent causes are faults in the electrical installation:
- Wires burnt or damaged due to excessive heat
- Corroded or oxidized connectors
- Open circuits or loose connections
- Short circuits between wires or to ground
Sensor faults
- Internal sensor defect – thermistor no longer responds correctly
- Contamination of the sensing element
- Normal wear after thousands of kilometers of operation
- Repeated thermal shocks
Systemic issues
- Changes to the exhaust system — aftermarket pipes altering flow
- Massive exhaust leaks affecting backpressure
- Damaged catalyst altering thermal parameters
Common diagnostic mistakes
Confusion with the oxygen sensor
The most common diagnostic error is confusing the temperature sensor with the oxygen sensor. They are completely different components:
- Temperature sensor — monitors only gas temperature
- Oxygen sensor — measures oxygen content to adjust the mixture
Replacing the oxygen sensor will not fix P2036.
Assumed integration
Many believe the temperature sensor is integrated into the oxygen sensor. This is incorrect — they are separate components with distinct functions.
Diagnostic process
Equipment needed
For a correct diagnosis you’ll need:
- Professional OBD2 scanner for live data readings
- Digital multimeter for voltage and resistance measurements
- Hot air gun for thermal testing
- Vehicle-specific electrical diagrams
Steps of diagnosis
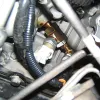
1. Initial visual inspection
Begin with a thorough check of:
- All wires in the sensor area
- Connectors for signs of corrosion or burning
- The sensor itself for visible damage
- The exhaust system for leaks
2. Scanning and recording codes
- Connect the OBD2 scanner
- Record all stored codes
- Note live data from the temperature sensor
- Clear the codes and test for recurrence
3. Electrical testing
Sensor resistance check:
- Disconnect the sensor from the harness
- Measure resistance between the sensor terminals
- Normal value: about 150 ohms at ambient temperature
- Resistance below 50 ohms indicates a faulty sensor
Thermal testing:
- With the multimeter still connected, apply heat to the sensor using the hot air gun
- Resistance should decrease as temperature rises
- If resistance increases with temperature, the sensor is faulty
4. Power supply check
- Turn the ignition on without starting the engine
- Check for 5V on the signal wire
- Test continuity of the ground wire
- Check continuity of the circuit back to the PCM
Repair procedure
Common repairs
For wiring issues:
- Replace damaged sections of wiring
- Clean and protect corroded connectors
- Use heat-resistant materials near the exhaust
For faulty sensors:
- Replace the sensor with an OEM or equivalent part
- Ensure specifications match the original
- Apply thermally conductive paste if needed
For PCM issues:
- Check the PCM power supply and grounding
- Test continuity of internal circuits
- In rare cases, replace the PCM (requires programming)
Special considerations
For modified systems: If aftermarket exhaust systems that remove catalysts are installed, this code can appear due to altered flow and gas temperatures. The technical solution involves installing a 2.5 ohms resistor in the circuit, but check local emissions regulations.
Preventing future problems
- Regular maintenance of the exhaust system
- Periodic inspection of connectors and wiring
- Use of high-quality fuel to minimize deposits
- Avoiding engine overheating by maintaining a functional cooling system
Repair costs
- New sensor: 150-400 lei (depends on vehicle make)
- Diagnostic labor: 100-200 lei
- Wiring repairs: 50-150 lei
- PCM replacement (rare): 2000-5000 lei + programming
The P2036 code is usually a problem that can be fairly easily resolved by replacing the sensor or repairing wiring. Correct diagnosis is essential to avoid unnecessary component replacements and to ensure the emissions-control system operates correctly.