- PCM detects abnormally high fuel pressure regulator readings or voltage, triggering P0092.
- Symptoms include hard starting, rough idle, power loss, and fuel odor.
- Main causes include faulty regulator, bad pump, clogged filter, or faulty sensor.
- MIL may require several fault cycles to illuminate.
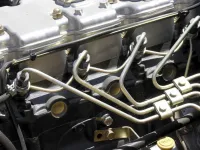
Fuel pressure regulator control circuit – high is the focus of OBD-II code P0092. This issue affects the fuel supply system and can cause hard starting or improper engine operation. The fuel pressure regulator is a critical component that controls the precise amount of fuel delivered to the injectors, essential for optimal engine performance.
This code is activated when the PCM (Powertrain Control Module) detects an abnormally high reading in the fuel pressure regulator’s electronic circuit, exceeding the manufacturer’s predefined limits.
What P0092 means
Code P0092 is stored when the PCM detects that the fuel pressure or the voltage signal from the regulator exceeds normal operating values. The fuel pressure regulator’s role is to maintain a constant and optimal pressure in the fuel system, ensuring proper injector operation.
When the code is triggered
Code P0092 is triggered in the following situations:
- Fuel pressure exceeds the manufacturer’s preset limits
- The regulator voltage signal is too high
- The PCM detects an anomaly in the regulator control circuit
- The system records abnormal values over a continuous period
Important: Some vehicles require multiple consecutive fault cycles for the Malfunction Indicator Lamp (MIL) to illuminate on the dash.
Symptoms of P0092
Vehicles with code P0092 may exhibit the following characteristic symptoms:
- Difficulty starting or inability to start the engine
- Rough engine operation at idle
- Power loss during acceleration
- Increased fuel consumption without an apparent reason
- Check Engine light on the dashboard
- Strong fuel odor in the engine bay
- Unstable idle or unexpected engine stalling
- Sudden or uncontrolled accelerations during normal driving
- Black exhaust smoke due to a rich mixture
Main causes of the problem
Direct causes of the fuel system
- Defective electronic fuel pressure regulator – this is the most common cause of P0092. The regulator may fail to control pressure correctly, allowing excessively high values.
- Faulty or degraded fuel pump can generate inconsistent pressures, triggering the code.
- Clogged fuel filter reduces normal flow, forcing the pump to work at higher pressures to compensate.
- Defective fuel pressure sensor sends erroneous signals to the PCM, indicating falsely high pressures.
Electrical and electronic causes
- Damaged or corroded wiring in the regulator circuit can cause shorts or abnormal resistances.
- Corroded or faulty electrical connectors affect signals between components.
- Blown fuses in the power supply circuit disrupt normal system operation.
- Electromagnetic interference from other vehicle systems can perturb signals.
Mechanical causes
- Blocked or kinked fuel lines restrict flow and raise pressure in certain areas.
- Injectors not functioning properly can disturb pressure balance in the system.
- Contaminated fuel tank affects pump and filter operation.
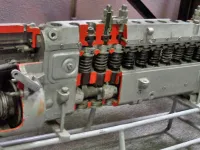
- High-pressure pump failures in direct-injection engines can generate excessive pressures.
Common misdiagnoses
Warning: In many cases, technicians replace the pressure regulator when the actual issue lies elsewhere:

- Faulty fuel pressure sensor – the most frequently misdiagnosed component
- Damaged wiring transmitting erroneous signals
- PCM calibration or old firmware issues
- Clogged fuel filter not checked initially
- Corroded connector contacts not cleaned
Professional tip: Always check fuel level and level sensor operation before replacing costly components. A nearly empty tank can cause false readings.
Professional diagnostic process
Tools and equipment needed
For a correct diagnosis you will need:
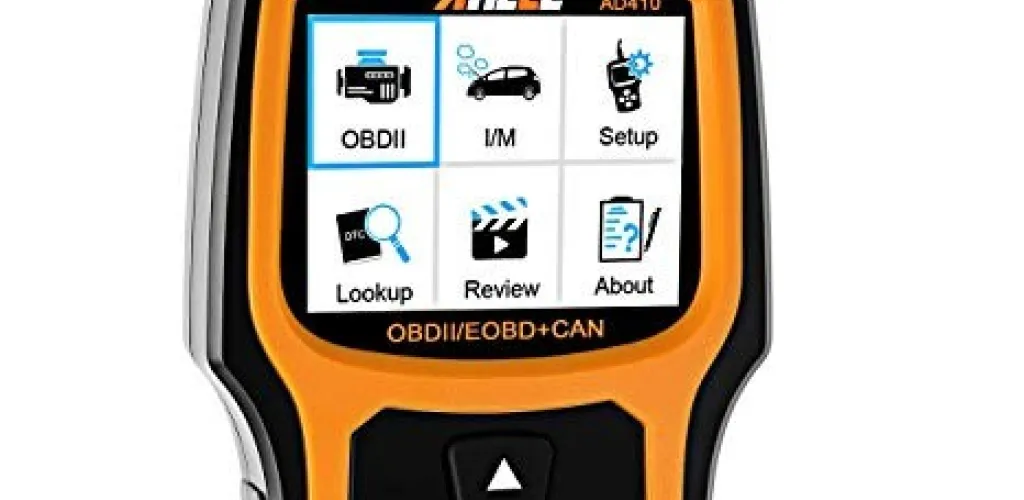
- Professional OBD-II scanner with advanced functions
- Digital multimeter (voltmeter/ohmmeter) with precision
- Calibrated fuel pressure gauge
- Oscilloscope for advanced signal analysis
- Vehicle manufacturer service manual
- Safety equipment for working with fuels
Step 1: Preliminary visual inspection
Check visible components:
- Inspect all wiring and connectors in the fuel system
- Look for corrosion, damage, or disconnections
- Check fuses related to the fuel system
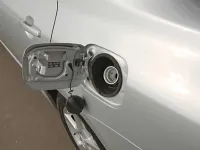
- Look for fuel leaks around the pump and regulator
- Inspect the condition of the fuel filter and lines
Preliminary repairs:
- Repair or replace damaged components
- Clean corroded connectors with contact cleaner
- Replace blown fuses
- Re-test the system after repairs
Step 2: scanning and code analysis
Scan procedure:
- Connect the scanner to the OBD-II port
- Record all stored codes, including pending codes
- Note freeze-frame data at the time of the fault
- Check real-time fuel system parameters
- Review code history to identify patterns
Data interpretation:
- Document PCM-recorded fuel pressure
- Check the fuel pressure sensor voltage
- Monitor the regulator control signal
- Clear codes and restart the vehicle to see if the issue is intermittent
Step 3: fuel pressure testing
Pressure measurements:
- Connect the gauge per the manufacturer’s specs
- Turn key to ON (do not start) and read initial pressure
- Start the engine and monitor pressure variations at different RPMs
- Check pressure hold after engine shutdown
Typical reference values for most vehicles:
- Idle pressure: 35-45 psi (2.4-3.1 bar)
- During acceleration: 40-50 psi (2.8-3.4 bar)
- Pressure with engine off: hold for at least 10 minutes
- Allowed variations: up to 5-10% from nominal values
Step 4: advanced electrical testing
Fuel pressure sensor test:
- Disconnect the sensor connector
- Check PCM reference voltage (usually 5V ±0.25V)
- Test ground continuity to PCM
- Measure sensor resistance per the manufacturer’s diagram
- Test output signal at varying pressures
Fuel pressure regulator test:
- Disconnect regulator electrical connector
- Verify supply voltage from PCM (typically 12V)
- Test PWM control signal with a multimeter or oscilloscope
- Monitor voltage variation during operation under different loads
- Check coil resistance of the regulator per spec
Typical electrical values:
- Supply voltage: 12V ±1V
- PWM signal: 0-12V with specified frequency
- Regulator coil resistance: per manufacturer data (typically 10-50 ohms)
Step 5: PCM diagnosis
If all components and circuits test good:
PCM checks:
- Verify PCM programming and available updates
- Analyze regulator control signals with an oscilloscope
- Review manufacturer technical bulletins for known issues
- Check sensor calibration within the PCM software
- Test other systems controlled by the PCM
Note: PCM failure is relatively rare, and replacement requires specialized reprogramming with dedicated equipment.
Detailed repair solutions
Replacing the fuel pressure regulator
Estimated cost: 150-400 RON parts + 100-200 RON labor
Replacement procedure:
- Depressurize the fuel system per the manufacturer’s procedure
- Disconnect the battery (negative terminal) for safety
- Remove protective caps to access the regulator
- Disconnect electrical connectors and fuel lines
- Remove the old regulator and clean contact surfaces
- Install the new regulator with new seals
- Reconnect all components and test the system
Important specifications:
- Use only OEM or quality equivalent regulators
- Follow torque specifications for fittings
- Ensure correct orientation during installation
Replacing the fuel pressure sensor
Estimated cost: 100-250 RON parts + 80-150 RON labor
Detailed procedure:
- Locate the sensor on the fuel rail or main line
- Depressurize the system before removal
- Disconnect the electrical connector carefully
- Remove the sensor with the appropriate wrench (usually 22 mm or 7/8“)
- Clean threads and apply sealant paste if specified
- Install the new sensor following torque specs
- Reconnect the connector and test operation
Calibration and testing:
- Some vehicles require calibration after replacement
- Test with a scan tool to verify correct values
- Perform a road test for final verification
Repairing damaged wiring
Estimated cost: 50-200 RON materials + 100-300 RON labor
Problem identification:
- Use a multimeter to test continuity
- Inspect insulation along the full length of wires
- Identify corrosion or breakage points
- Document the wiring schematic before disconnecting
Professional repair:
- Use correctly gauged wires per original specs
- Make joints with solder for durability
- Apply heat-shrink tubing for protection
- Secure wiring in original supports
- Check continuity and insulation after repair
Replacing the fuel pump
Estimated cost: 300-800 RON parts + 200-400 RON labor
This is a complex repair that requires:
- Draining the fuel tank
- Removing the pump assembly from the tank
- Installing a new pump with all gaskets
- Checking pressure after installation
Mandatory safety measures
Warning: Critical safety measures
Before work:
- Fully depressurize the system per the manufacturer’s procedure
- Disconnect the battery and wait 10 minutes to dissipate condensers
- Work in a well-ventilated area away from ignition sources
- Prohibit smoking and the use of unprotected electrical equipment
Protective equipment:
- Fuel vapor protective eyewear
- Fuel-resistant gloves
- Static-free clothing
- Respiratory protection in enclosed spaces
Safety equipment:
- Fire extinguisher nearby
- Spill absorbent kit
- Forced ventilation in closed workshops
- Phone available for emergencies
Preventing future problems
Preventive maintenance program
Fuel filter maintenance:
- Replacement at 20,000-40,000 km depending on usage
- Visual inspection at 10,000 km for signs of clogging
- Immediate replacement at any sign of contamination
Fuel quality:
- Use high-quality fuel from reputable stations
- Periodic fuel system cleaners as recommended
- Avoid old fuel in long-dormant tanks
- Keep the tank topped up to minimize condensation
Driving practices:
- Avoid running the tank below 1/4 to protect the pump
- Do not force starting if the engine is not starting promptly
- Stop the engine immediately at abnormal operating signs
- Warm up the engine before hard accelerations
System monitoring
Regular checks:
- Watch monthly fuel consumption changes
- Be alert to symptoms of irregular operation
- Perform OBD-II scans every 6 months or 10,000 km
- Check dashboard gauges at every start
Early warning signs:
- Changes in idle speed
- Difficult starting when cold
- Fuel smells inside the cabin
- Reduced acceleration performance
Cost analysis of repairs
Detailed table with estimated costs
| Component | Part cost (RON) | Labor (RON) | Diagnostic (RON) | Total (RON) |
|---|---|---|---|---|
| Fuel pressure regulator | 150-400 | 100-200 | 80-120 | 330-720 |
| Fuel pressure sensor | 100-250 | 80-150 | 80-120 | 260-520 |
| Fuel pump | 300-800 | 200-400 | 100-150 | 600-1350 |
| Fuel filter | 50-150 | 80-120 | 50-80 | 180-350 |
| Wiring repairs | 20-100 | 100-300 | 100-200 | 220-600 |
| PCM (reprogramming) | 0-100 | 200-500 | 150-300 | 350-900 |
Factors influencing costs:
- Vehicle make and model – premium vehicles have higher costs
- Vehicle age – parts for older models can be pricier
- Geographic region – prices vary between cities
- Complexity of access to components in the engine bay
- Need for special equipment for diagnostics or calibration
Cost-reduction strategies
Legitimate economical options:
- Use reputable aftermarket parts
- Compare prices from multiple suppliers
- Repair wiring instead of replacing entire harnesses
- Perform preventive maintenance to avoid major faults
Beware of false economy:
- Do not use counterfeit or questionable-quality parts
- Do not ignore necessary repairs to save short-term costs
- Do not attempt complex repairs without the required expertise
Conclusion and final recommendations
Code P0092 is a serious issue that requires prompt attention and professional handling. While it can seem intimidating, with proper diagnosis and repairs, most cases can be resolved efficiently and durably.
Key takeaways:
For vehicle owners:
- Do not ignore this code – it can cause costly engine damage
- Stop driving if severe symptoms appear
- Consult a qualified technician for professional diagnosis
- Invest in preventive maintenance to avoid future problems
For auto technicians:
- Always perform a systematic and thorough diagnosis
- Do not assume the cause without proper electronic verification
- Use only calibrated equipment for precise measurements
- Document all repairs for future reference
Long-term prognosis: A correct diagnosis followed by professional repairs will keep the vehicle operating optimally for many years. Adhering to a preventive maintenance schedule will minimize the risk of recurrence and protect the vehicle investment.
Modern fuel systems are complex but reliable when properly maintained. OBD-II technology provides valuable tools for early problem detection, allowing preventive interventions before major failures occur.