- Park on flat surface, engine running, neutral, parking brake engaged for safe diagnosis.
- Turn on max fan and A/C; check LED to confirm activation.
- Weak airflow at all speeds; measure vent temperature for 30-40° drop.
- Inspect condenser for obstructions; check belt tension; monitor compressor operation.
Problems with car air conditioning can occur at the most inconvenient moments, especially during hot summer days when the reliance on cooling becomes critical. Fortunately, many causes of dysfunction can be identified and resolved through simple checks, saving significant repair costs.
Understanding how the automotive climate control system works and knowing the diagnostic steps can help you quickly identify the problem and make the right repair decision. This guide will help you diagnose the issue accurately and better understand the complexity of the air conditioning system.
Preparation for diagnosis
Before starting any checks, ensure the vehicle is parked on a flat surface, with the engine running, transmission in neutral, and the parking brake engaged. These safety measures are essential for a safe and efficient diagnosis.
Checking the interior system
Starting and basic operation test
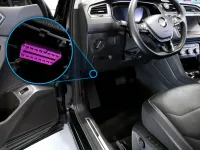
Turn the fan on at maximum speed and activate the air conditioning button (often labeled A/C or MAX A/C). Observe the LED indicator that should light up when the system is activated. The absence of this indication may signal a problem with the main switch or the electrical supply.
Checking airflow through the vents
Test the air intensity at all fan speed levels. If you don’t feel air coming out of the vents or if the airflow works only at certain levels, the issue may be related to the blower motor or its resistor. These components can fail and hinder air circulation through the ventilation system.

Assessing airflow strength
Even if air is coming through the vents, the intensity may be insufficient. A weak airflow can indicate issues with the cabin air filter or obstructions in the ventilation system. Check and replace the filter if needed.
Measuring the air temperature
Use a digital thermometer to measure the air temperature at the outlet of the vents. Position the thermometer near the vent on the driver’s side for a precise reading.
Important: A functional air conditioning system reduces the temperature by 30-40 degrees compared to the outside air. Factors such as ambient temperature and vehicle speed influence system performance.

Checking exterior components and the engine compartment
Inspecting airflow through the condenser
Examine the front grille and the condenser area for possible obstructions. Leaves, dust, insects, or other debris can block the airflow necessary to cool the refrigerant. Regular cleaning of these areas can prevent many operation problems.
Inspecting the drive belt
With the engine off and the key removed from the ignition, check the condition of the belt that drives the air conditioning compressor. Some vehicles have a belt dedicated solely to the compressor. Press the belt with your fingers to test tension – a belt that is too loose will not drive the compressor effectively.
Monitoring the compressor operation
With the engine running and the air conditioning at maximum, observe and listen to the compressor cycling. A healthy compressor will start and stop at regular intervals. If it makes no cycle or cycles very quickly (every few seconds), the refrigerant level may be low.

Checking the electrical system
If the air conditioning compressor is not functioning, check the fuses and relays specific to the climate control system. Replace faulty components and retest the system. If the problem persists, wiring and pressure switches require testing with specialized equipment.
Advanced diagnosis with a pressure gauge
Preparing for measurements
With the engine off, locate the high‑ and low‑pressure ports of the air conditioning system. These are usually marked and have different sizes to prevent incorrect connections.

Connecting the manometer
Install the pressure gauge for the air conditioning system according to the manufacturer’s instructions. Start the engine and set the air conditioning to maximum for accurate measurements.
Interpreting pressure readings
Under normal operating conditions, the low‑side pressure should be around 40 psi, while the high‑side pressure should vary between 170–250 psi, depending on ambient temperature and system size. Readings outside these parameters indicate issues with the system.
Identifying refrigerant leaks
If the pressures are below normal, the system has a refrigerant leak. Leaks occur frequently at the condenser (exposed to damage from gravel) but also at pipe fittings connections. Look for oil traces around these areas—a clear indicator of leaks.
Small or interior leaks in the dashboard area can be hard to detect visually and require specialized equipment to locate.
Recharging the system
After identifying and repairing the leak, the system must be recharged with the correct amount of refrigerant. This operation requires specialized equipment and technical knowledge for a safe and efficient execution.
When to call a specialist
Diagnosing an air conditioning problem is only the first step. For complex repairs that involve handling refrigerant or electrical components, it is recommended to consult a specialized mechanic who has the knowledge, experience, and equipment needed for a safe and durable repair.
The car’s air conditioning system is complex and requires regular maintenance to operate optimally. Periodic checks and understanding warning signs can prevent major failures and ensure year‑round comfort.
Photo sources: blog.firestonecompleteautocare.com, veteransstudies.org, toyota-industries.com