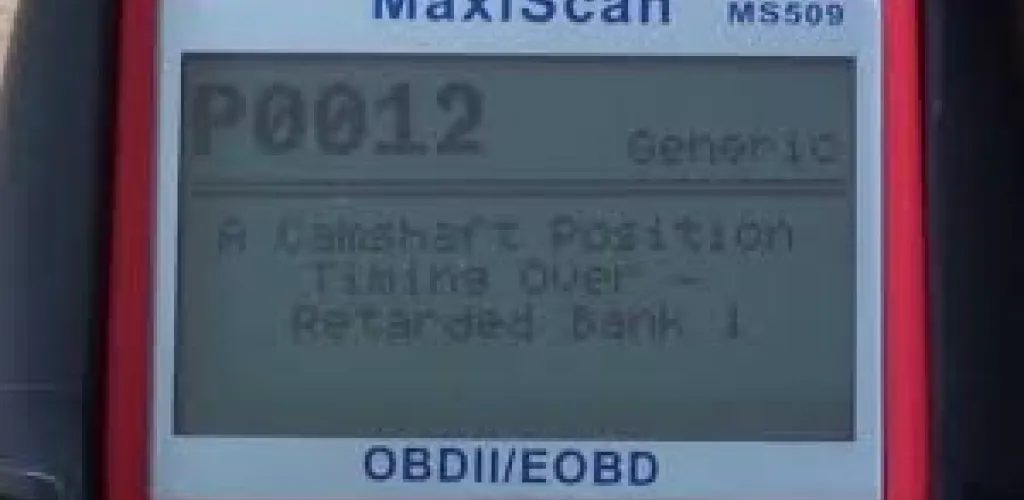
- P0012 means camshaft A timing for cylinder 1 is delayed.
- Timing variations over 10 degrees at idle trigger the code in the ECU.
- Symptoms include check engine light, 10–15% fuel economy loss, rough idle.
- Causes include lubrication problems such as degraded or incorrect engine oil affecting VVT.
The P0012 OBD2 error code is one of the most common timing-related faults found in modern vehicles equipped with variable valve timing systems. This fault refers to the Camshaft ‘A’ Position – Delayed Timing (cylinder 1) and can significantly affect engine performance, fuel economy, and emissions. Understanding this issue and applying a correct diagnostic are essential to keep the engine within optimal operating parameters.
The variable valve timing system (VVT/VCT) is a sophisticated technology that allows optimization of engine performance by adjusting the opening and closing moments of the valves according to driving conditions. When this system does not function correctly, various issues can arise that affect the entire engine operation.
Understanding the P0012 Code
Technical Definition
The P0012 code indicates that the camshaft timing for cylinder 1 of the engine is not operating within normal limits. The Variable Valve Timing system (VVT/VCT) fails to maintain optimal synchronization between the camshaft and crankshaft, resulting in delayed timing that exceeds the programmed tolerances in the engine control unit (ECU).
Activation Criterion
Timing variations between the camshaft and crankshaft that exceed the reference value of 10 degrees (engine idling) will initiate the storage of a code in the PCM (Powertrain Control Module). This tolerance threshold is set to allow minor normal variations in system operation, but to quickly detect faults that can affect performance.
Impact on Engine Systems
When the VVT system does not operate correctly, the engine cannot optimize:
- Filling the cylinders with the air–fuel mixture
- Expulsion of burned gases from the combustion chambers
- Valve overlap to improve performance
- Pollutant emissions in line with Euro standards
Symptoms of the P0012 Code
Visible and Audible Symptoms
The main manifestations of this problem include:
- The Check Engine light turning on on the dashboard
- Increased fuel consumption by up to 10–15%
- Reduced engine performance, especially during acceleration
- Irregular or unstable idle, with RPM fluctuations
- Difficult engine starting, especially when cold
- Unusual noises from the engine area, such as a rattling sound
- Power loss on acceleration and passes
- Increased emissions detectable during the ITP test
Symptoms Under Specific Conditions
Depending on the severity of the issue, the following may occur:
- Idle shuddering when the air conditioning system is on
- Difficult cold starts due to suboptimal timing
- Poor acceleration response at low revs
- Uneven operation during prolonged idle
Main Causes of the P0012 Code
Causes Related to the Lubrication System
The most common causes are related to the quality and circulation of engine oil: Degraded or incorrect engine oil:
- Inappropriate viscosity for the manufacturer’s specifications
- Old oil with reduced lubricating properties
- Contamination of oil with metal particles
- Using oils that do not meet required standards Oil circulation issues:
- Low oil level in the engine below the minimum
- Oil passages clogged in the VVT system
- Clogged or low-quality oil filters
- Oil pump with reduced performance
VVT Component Failures
VVT/VCT Solenoid:
- Internal orifice clogging from carbon deposits
- Wear of the internal electromagnetic coil
- Deterioration of the rubber diaphragm
- Sticking of the internal piston in a fixed position VVT Actuator:
- Wear of internal gears
- Damage to pressure control passages
- Rotor sticking due to deposits
- Loss of seals in the pressure chambers
Electrical and Electronic Problems
Position Sensors:
- Damaged camshaft position sensor
- Defective crankshaft position sensor
- Incorrect synchronization between the two sensor signals
- Electromagnetic interference in the signal circuit Electrical Circuits:
- Worn or corroded wiring
- Loose or oxidized electrical connectors
- Damaged fuses in the power circuit
- Faulty grounding in the electrical system
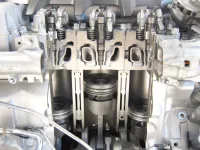
Mechanical Timing Problems
Timing Components:

- Timing belt or chain stretched beyond limits
- Worn tensioners that do not maintain proper tension
- Worn or damaged cam gears
- Damaged guides and tensioner plates
Professional Diagnosis for P0012
Required Equipment
A full diagnosis requires:
- A professional OBD-II scanner with advanced features
- Digital multimeter for electrical measurements
- Oscilloscope for waveform analysis
- Calibrated oil pressure gauge
- Vehicle-specific service manual
- Endoscope for visual inspection of components
Systematic Diagnostic Procedure
Step 1: Preliminary Checks
Initial inspection:
- Visual inspection of the engine bay
- Checking oil level and quality
- Inspecting visible wiring and connectors
- Checking relevant fuses in the fuse box
- Listening for unusual engine noises Code scanning:
- Connecting the OBD-II scanner to the diagnostic port
- Reading all codes stored in the ECU
- Analyzing accompanying codes that may indicate the primary cause
- Checking live parameters of the VVT system
Step 2: Electrical System Testing
Power supply verification:
- Measuring the supply voltage to the VVT solenoid (12V)
- Checking reference voltage to sensors (5V)
- Testing ground circuit continuity
- Checking the solenoid coil resistance (as specified in the manual) Sensor testing:
- Analyzing sensor signals with the oscilloscope
- Checking synchronization between the camshaft and crankshaft sensors
- Testing sensor response to engine rotation
- Checking the physical integrity of gears/sprockets
Step 3: Hydraulic System Testing
Oil pressure:
- Measuring oil pressure at idle and at higher RPM
- Checking the pressure in the VVT circuit with a specialized manometer
- Monitoring oil flow to the VVT actuator
- Testing the oil pump operation Testing the VVT actuator:
- Controlled activation of the solenoid with the scanner
- Real-time monitoring of the actuator response
- Checking the actuator travel limits
- Verifying hydraulic system seals
Step 4: Mechanical Synchronization Check
Engine timing:
- Verifying timing marks on the camshaft and crankshaft
- Checking timing belt/chain tension
- Inspecting tensioners and guides
- Measuring wear on critical components
Solutions and Repair Methods
Basic Repairs
Lubrication system maintenance:
- Complete oil change with oil meeting specifications
- Replacing the oil filter with an OEM or equivalent
- Cleaning the lubrication system with special additives
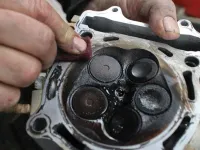
- Refil oil to the recommended optimal level Cleaning VVT components:
- Removing and cleaning the VVT solenoid with a special solvent
- Cleaning oil passages in the cylinder head
- Replacing worn gaskets of the system
- Checking and cleaning oil filters in the system
Intermediate Repairs
Replacing VVT components:
- Replacing the VVT solenoid with a new OEM unit
- Replacing the VVT actuator if mechanically damaged
- Repairing damaged wiring or replacing it entirely
- Replacing camshaft position sensors Electrical repairs:
- Repairing or replacing corroded electrical connectors
- Replacing damaged wiring with compliant ones
- Checking and repairing grounding issues
- ECU software update if required
Major Repairs
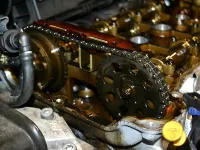
Timing system repair:
- Replacing timing belt/chain and related components
- Replacing worn tensioners and guides
- Replacing cam gears if worn
- Repairing or replacing the oil pump Complex repairs:
- Replacing camshafts in extreme wear cases
- Repairing the cylinder head if channels are damaged
- Complete ECU reprogramming after major repairs
- Checking and adjusting all system parameters
Preventing Future Problems
Preventive Maintenance
Oil change schedule:
- Strictly follow the manufacturer’s recommended intervals
- Use only the oil specified in the service manual
- Check oil level at least once a month
- Monitor abnormal oil consumption Periodic system checks:
- Verify VVT system operation at an authorized service center
- Periodically scan for error codes with a scanner
- Visually inspect accessible components
- Listen for unusual engine noises
Correct Vehicle Use
Optimal driving regimen:
- Avoid high RPMs when the engine is cold
- Gradually warm up the engine before load
- Avoid prolonged idling
- Use the recommended quality fuel
Estimated Repair Costs
Diagnosis and Maintenance
- Comprehensive professional diagnosis: 200–400 RON
- Premium engine oil change: 200–450 RON
- VVT system cleaning: 150–300 RON
- Timing check and adjustment: 300–600 RON
Component Replacement
- New VVT solenoid (OEM): 300–1,200 RON + labor 200–400 RON
- Camshaft position sensor: 200–700 RON + labor 150–300 RON
- Complete VVT actuator: 800–2,500 RON + labor 400–800 RON
- Complete timing kit: 1,800–5,000 RON + labor 800–1,500 RON
Major Repairs
- Cylinder head repair: 2,000–5,000 RON + labor
- Oil pump replacement: 1,200–2,800 RON + labor
- ECU reprogramming: 400–800 RON
- Complete VVT system overhaul: 3,000–7,000 RON
Safety Measures During Repairs
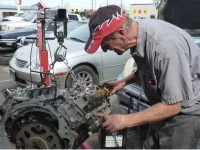
For the Automotive Technician
- Use of appropriate personal protective equipment
- Work with a cold engine to avoid burns
- Adhere to specified torque values
- Use only original or certified equivalent parts
For the Vehicle Owner
- Avoid driving with the P0012 code active
- Continuously monitor engine temperature
- Stop immediately if unusual noises occur
- Consult a specialist as soon as possible
Conclusion
The P0012 error code represents a serious issue that requires immediate attention and a systematic approach to correctly identify its cause. Although the complexity of modern VVT systems can be intimidating, most cases can be resolved through proper maintenance and replacement of worn components with quality parts.
Ignoring this code can lead to serious and costly engine damage, including premature valve wear, piston damage, or even complete engine seizure. Investing in professional diagnostics and a proper repair is always more economical than the cost of a major repair later.
Expert Recommendation: For precise diagnostics and safe repairs, it is essential to consult a qualified mechanic with experience in VVT/VCT systems and modern diagnostic equipment. Only by using the correct tools and applying the specific procedures can a durable and effective repair be ensured.