- Cool brakes for 45 minutes; never cool with water.
- Park on flat surface; apply parking brake when lifting.
- Tools: flashlight, jack and wrench, ruler, gloves; check brake fluid color and level.
- Quick rim check: under 3mm urgent; 3–5mm scheduled; over 8mm good.
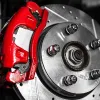
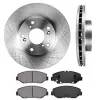
Brake pads are among the most critical components for your vehicle’s safety. When you press the brake pedal, the pads clamp onto the [brake discs], generating the force needed to stop the vehicle. Worn brake pads not only reduce braking efficiency but can lead to serious accidents and costly repairs. Fortunately, you can inspect their condition at home with simple tools in just a few minutes.
Understanding the right time to replace the pads and knowing the wear indicators can help you avoid dangerous situations and save money by keeping the entire braking [braking system] in good condition.

Preparation for brake pad inspection
Before you start the inspection, safety must be the number one priority. The braking system operates at extremely high temperatures, and neglecting precautionary measures can lead to accidents.
Essential safety measures
- Cooling time: Allow the brakes to cool for at least 45 minutes after use. During braking, temperatures can exceed 200°C, and contact with hot components can cause severe burns
- Avoid cooling with water: Never try to cool brakes with cold water – thermal shock can crack the discs or damage the pads
- Vehicle stability: Ensure the car is on a flat and stable surface
- Parking brake: Always apply the parking brake when lifting the vehicle on a jack
Tools required
- Flashlight or phone light
- Jack and wheel wrench (if you need to remove the wheels)
- Ruler or caliper for precise measurements
- Protective gloves
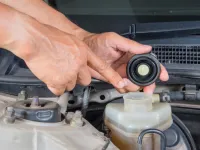
Pre-check of brake fluid
Take this moment to check the [brake fluid], as its condition is directly linked to the performance of the system:
- Normal color: Good fluid should be yellowish and translucent, similar to light olive oil but slightly more viscous
- Signs of degradation: If it is black, dark brown, or opaque, it should be replaced immediately
- Fluid level: Check the level in the brake reservoir – a low level can indicate advanced pad wear
Practical methods to check wear
Quick rim check (quick method)
For most modern vehicles with alloy wheels, you can inspect the pads without removing the wheels:
- Optimal positioning: Turn the steering wheel to gain maximum access to the brakes
- Illumination: Use a bright flashlight to clearly see through the wheel gaps
- Locate the pads: Look between the brake caliper and the brake disc
- Assess thickness: Visually measure the friction material thickness
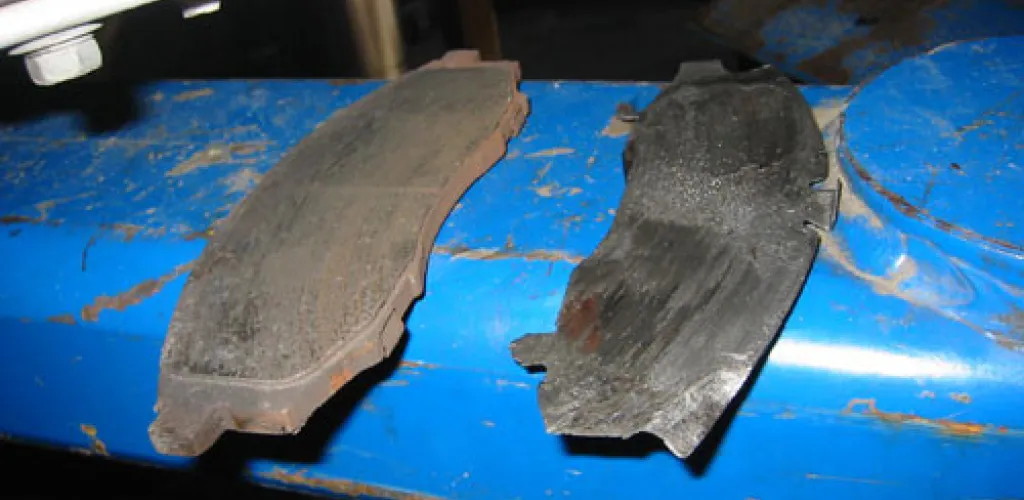
Key visual indicators:
- Thickness under 3 mm: urgent replacement
- Thickness 3-5 mm: schedule replacement
- Thickness over 8 mm: good condition
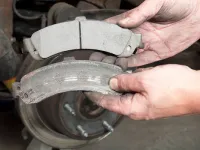
Full inspection with wheel removed
For a detailed inspection or when the wheels do not allow visual access:
- Raise the vehicle: Use the jack at the recommended lifting points
- Remove the wheel: Loosen the lug nuts in a cross pattern
- Full inspection: Check both pads (inner and outer)
- Precise measurement: Use a ruler for exact measurements
Advantages:
- Full access to all pad surfaces
- Ability to inspect the discs’ condition
- Identify uneven wear issues
Critical wear indicators and replacement guidance
Visual indicators
Brake dust analysis:
- Normal dust: Fine grey deposits on wheels – sign of normal operation
- Dust absence: Might indicate complete wear of the friction material
- Metal shavings: Shiny particles indicate metal-to-metal contact – STOP immediately!
Center gap check: Most modern pads have a center slot that serves as a visual indicator:
- Visible slot: pads are in good condition
- Slot nearly gone: replacement required
- Slot completely gone: critical wear
Audible indicators
Each sound has its meaning:
Fine metallic squeal:
- Cause: Wear indicator (metal tongue) contacting the disc
- Action: Replace within the next 1,000–2,000 km
Loud grinding noise:
- Cause: Direct metal-to-metal contact
- Action: Stop immediately and replace urgently
Vibration in pedal or steering wheel:
- Cause: Possible disc warping from overheating
- Action: Professional check required
Modern electronic indicators
Newer vehicles feature advanced wear monitoring systems:
- Wear sensors: Connected directly to the onboard system
- Digital displays: Show the exact wear percentage
- Preventive alerts: Warnings 2,000–3,000 km before critical wear
Optimal inspection frequency
Regular checks
Quick visual inspection:
- Every 5,000–10,000 km
- Before long trips
- After mountainous routes
- When you notice changes in braking behavior
Detailed check:
- At every service (15,000–20,000 km)
- Every 6 months for heavy urban use
- Annually for primarily highway driving
Factors influencing brake pad wear
Driving style
- Harsh, abrupt braking: Accelerates wear by up to 50%
- Preventive driving: Can double pad life
- Brake use on slopes: Places extra load on the braking system
Operating conditions
Traffic type:
- City (stop-and-go): 20,000–40,000 km pad life
- Highway: 50,000–80,000 km pad life
- Mountain routes: 15,000–30,000 km pad life
Environmental factors:
- High ambient temperatures
- Excessive humidity
- Dust and dirt on roads
- Road salt in winter
Vehicle characteristics
- Weight: Heavier vehicles wear pads faster
- Engine power: Performance cars require stronger braking
- Pad type: Ceramic (high durability), metallic (performance), organic (comfort)
Consequences of neglecting wear
Cascading damage
Disc damage:
- Grooving of the contact surface
- Overheating and warping
- Replacement cost 3–5 times higher
System problems:
- Overpressure: Caliper pistons travel farther
- Overheating: Risk of brake fluid vaporization
- Caliper damage: Piston sticking
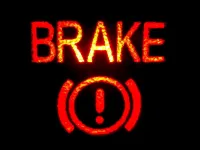
Safety risks
- Increased stopping distance by up to 40%
- Loss of control in wet conditions
- Total brake system failure
When to seek professional service
Signs that call for professional intervention
- Persistent abnormal noises even after inspection
- Soft brake pedal or pedal that travels too far
- Vehicle pulling to one side under braking
- Strong vibrations in steering wheel or pedal
- Smell of burning after normal braking
- Brake fluid low without apparent cause
Benefits of professional inspection
- Specialized equipment for precise measurements
- Mechanic’s experience in identifying hidden issues
- Comprehensive inspection of the entire braking system
- Personalized recommendations for your driving style
Tips to extend brake life
Efficient driving techniques
- Gradual braking: Start braking early and progressively
- Using engine braking: Reduces pad loading on hills
- Avoid overheating: Take breaks when driving aggressively in the mountains
- Maintain following distance: Reduces need for hard braking
Preventive maintenance
- Regular cleaning of brake dust from wheels
- Check tire pressure: Underinflated tires increase brake load
- Wheel balancing: Vibration affects wear uniformity
Conclusion
Regular brake pad inspection is a simple task any responsible driver can mastered. Investing a few minutes every 10,000 km can prevent serious accidents and save money by avoiding disc damage. Remember that [braking system] is the most important safety component of your vehicle. Proactive inspection and timely replacement of worn pads not only keep you safe but also maintain optimal car performance.
Golden rule: If in doubt about brake condition, consult a qualified mechanic. Your safety and that of other road users is priceless!
Photo sources: planet-9.com, artsautomotive.com