- Up to 46% of faults are battery-related; jump-starting is a crucial skill.
- Cables: min 16 mm (25 mm for engines >2.0L); use a 12V donor car.
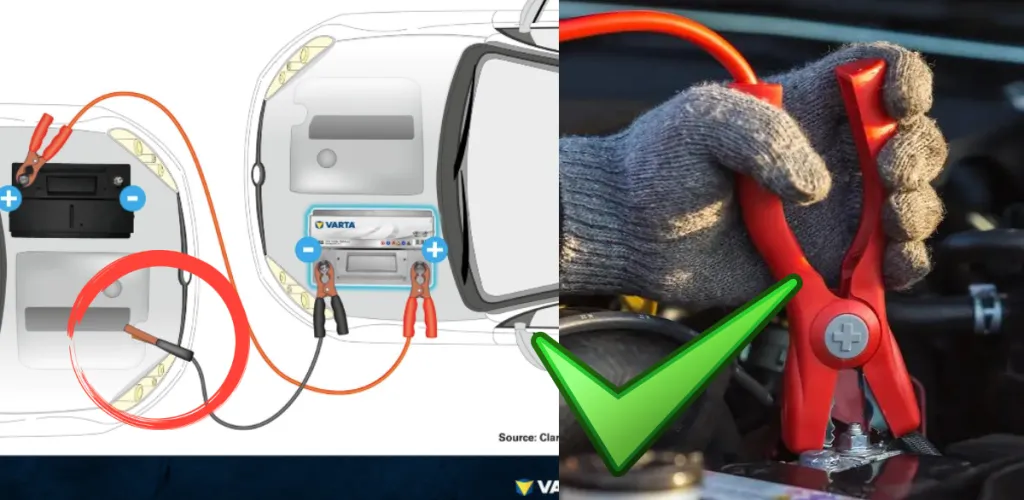
- Park on level ground, engage handbrake, keep cars apart, access proper terminals.
- Connect red to donor +, red to dead +, black to minus; start donor 2–3.
A dead battery can end a journey at the worst moment, but knowing how to apply the jump-start procedure correctly lets you solve the problem quickly and safely. According to ADAC studies, up to 46% of automotive faults are caused by battery problems, making this procedure one of the most useful skills you can have as a driver.
Understanding the correct connection sequence and safety measures is essential to avoid damage to the vehicle’s electrical system or the risk of injury.
Equipment needed for jump start
Jump-start cables
For a safe procedure, you need a quality set of jump-start cables. The diameter of the cable should be at least 16 mm for standard engines. For vehicles with larger engines (over 2.0 liters), cables with a diameter of 25 mm are recommended, capable of carrying the current without overheating.
Donor vehicle
The car providing the power must have a battery with the same voltage as the damaged vehicle. Fortunately, most modern cars use 12 V batteries, which simplifies the process.
Preparation for the jump start procedure
Vehicle positioning
Both cars should be parked on level ground and secured with the handbrake. Important: the vehicles must not touch to avoid short-circuit through the body.
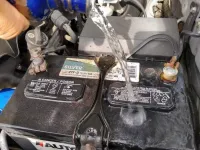
Locating the battery and terminals
In most modern vehicles, the battery is located in the engine compartment with positive and negative terminals easily accessible. If the battery is mounted in another location (trunk, under a seat), manufacturers provide special connections under the hood, properly marked.
Attention: Do not attempt to dismantle components to access the battery. Always use dedicated connection points.
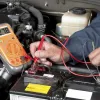
Step-by-step connection procedure
Correct order of connections
Step 1: Connect the first red clamp to the positive terminal (+) of the donor battery
Step 2: Connect the other red clamp to the positive terminal (+) of the discharged battery
Step 3: Connect the first black clamp to the negative terminal (-) of the donor battery
Step 4: Connect the last black clamp to a metal ground point on the vehicle with the discharged battery
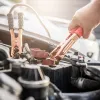
Why you should avoid connecting directly to the negative terminal
According to Varta’s recommendations, avoid connecting the black cable directly to the negative terminal of the discharged battery. The reason is that sparks produced at the final connection can damage a battery that is already weakened or can cause explosions if the battery emits gases.
Look for an unpainted metal spot near the engine block or directly on the block to make the final connection.
Starting the engine and disconnecting
Starting procedure
-
Start the donor vehicle and let it run for 2-3 minutes
-
For large engines: keep the donor vehicle at about 2000 rpm
-
Turn off all loads on the damaged vehicle (radio, climate control, lights)
-
Try starting the damaged vehicle
Safe disconnection
Remove the clamps in the reverse order of connection:
-
The black clamp from the metal ground
-
The black clamp from the negative terminal of the donor
-
The red clamp from the positive terminal of the repaired vehicle
-
The red clamp from the positive terminal of the donor
Driving to recharge the battery
Driving to recharge
After a successful start, drive for at least 15-20 minutes to allow the alternator to partially recharge the battery. For a full recharge, a longer trip is recommended or use a battery charger.
Checking the charging system
If the problem recurs frequently, check:
- The physical condition of the battery (corrosion, cracks)
- The operation of the alternator
- The presence of hidden loads
- The battery age (average lifespan: 4-6 years)
Essential safety measures
Protective equipment
- Wear protective gloves
- Avoid smoking or open flames
- Keep cables only by insulated handles
- Check the integrity of the cables before use
Situations when not to apply jump start
- Cracked or leaking battery
- Extremely low temperatures (below -20°C)
- Vehicles with different voltages
- Signs of damage to the electrical system
Knowing this procedure can save you from an unpleasant situation and can also help other drivers in need. Following the correct order of connections and safety measures ensures a risk-free operation for you and for the vehicles.